Build native apps for iPhone and Android with Skip
Skip brings Swift app development to Android. It is a tool that enables developers to use a single modern programming language (Swift) and first-class development environment (Xcode) to build genuinely native apps for both iOS and Android.


How Skip Works
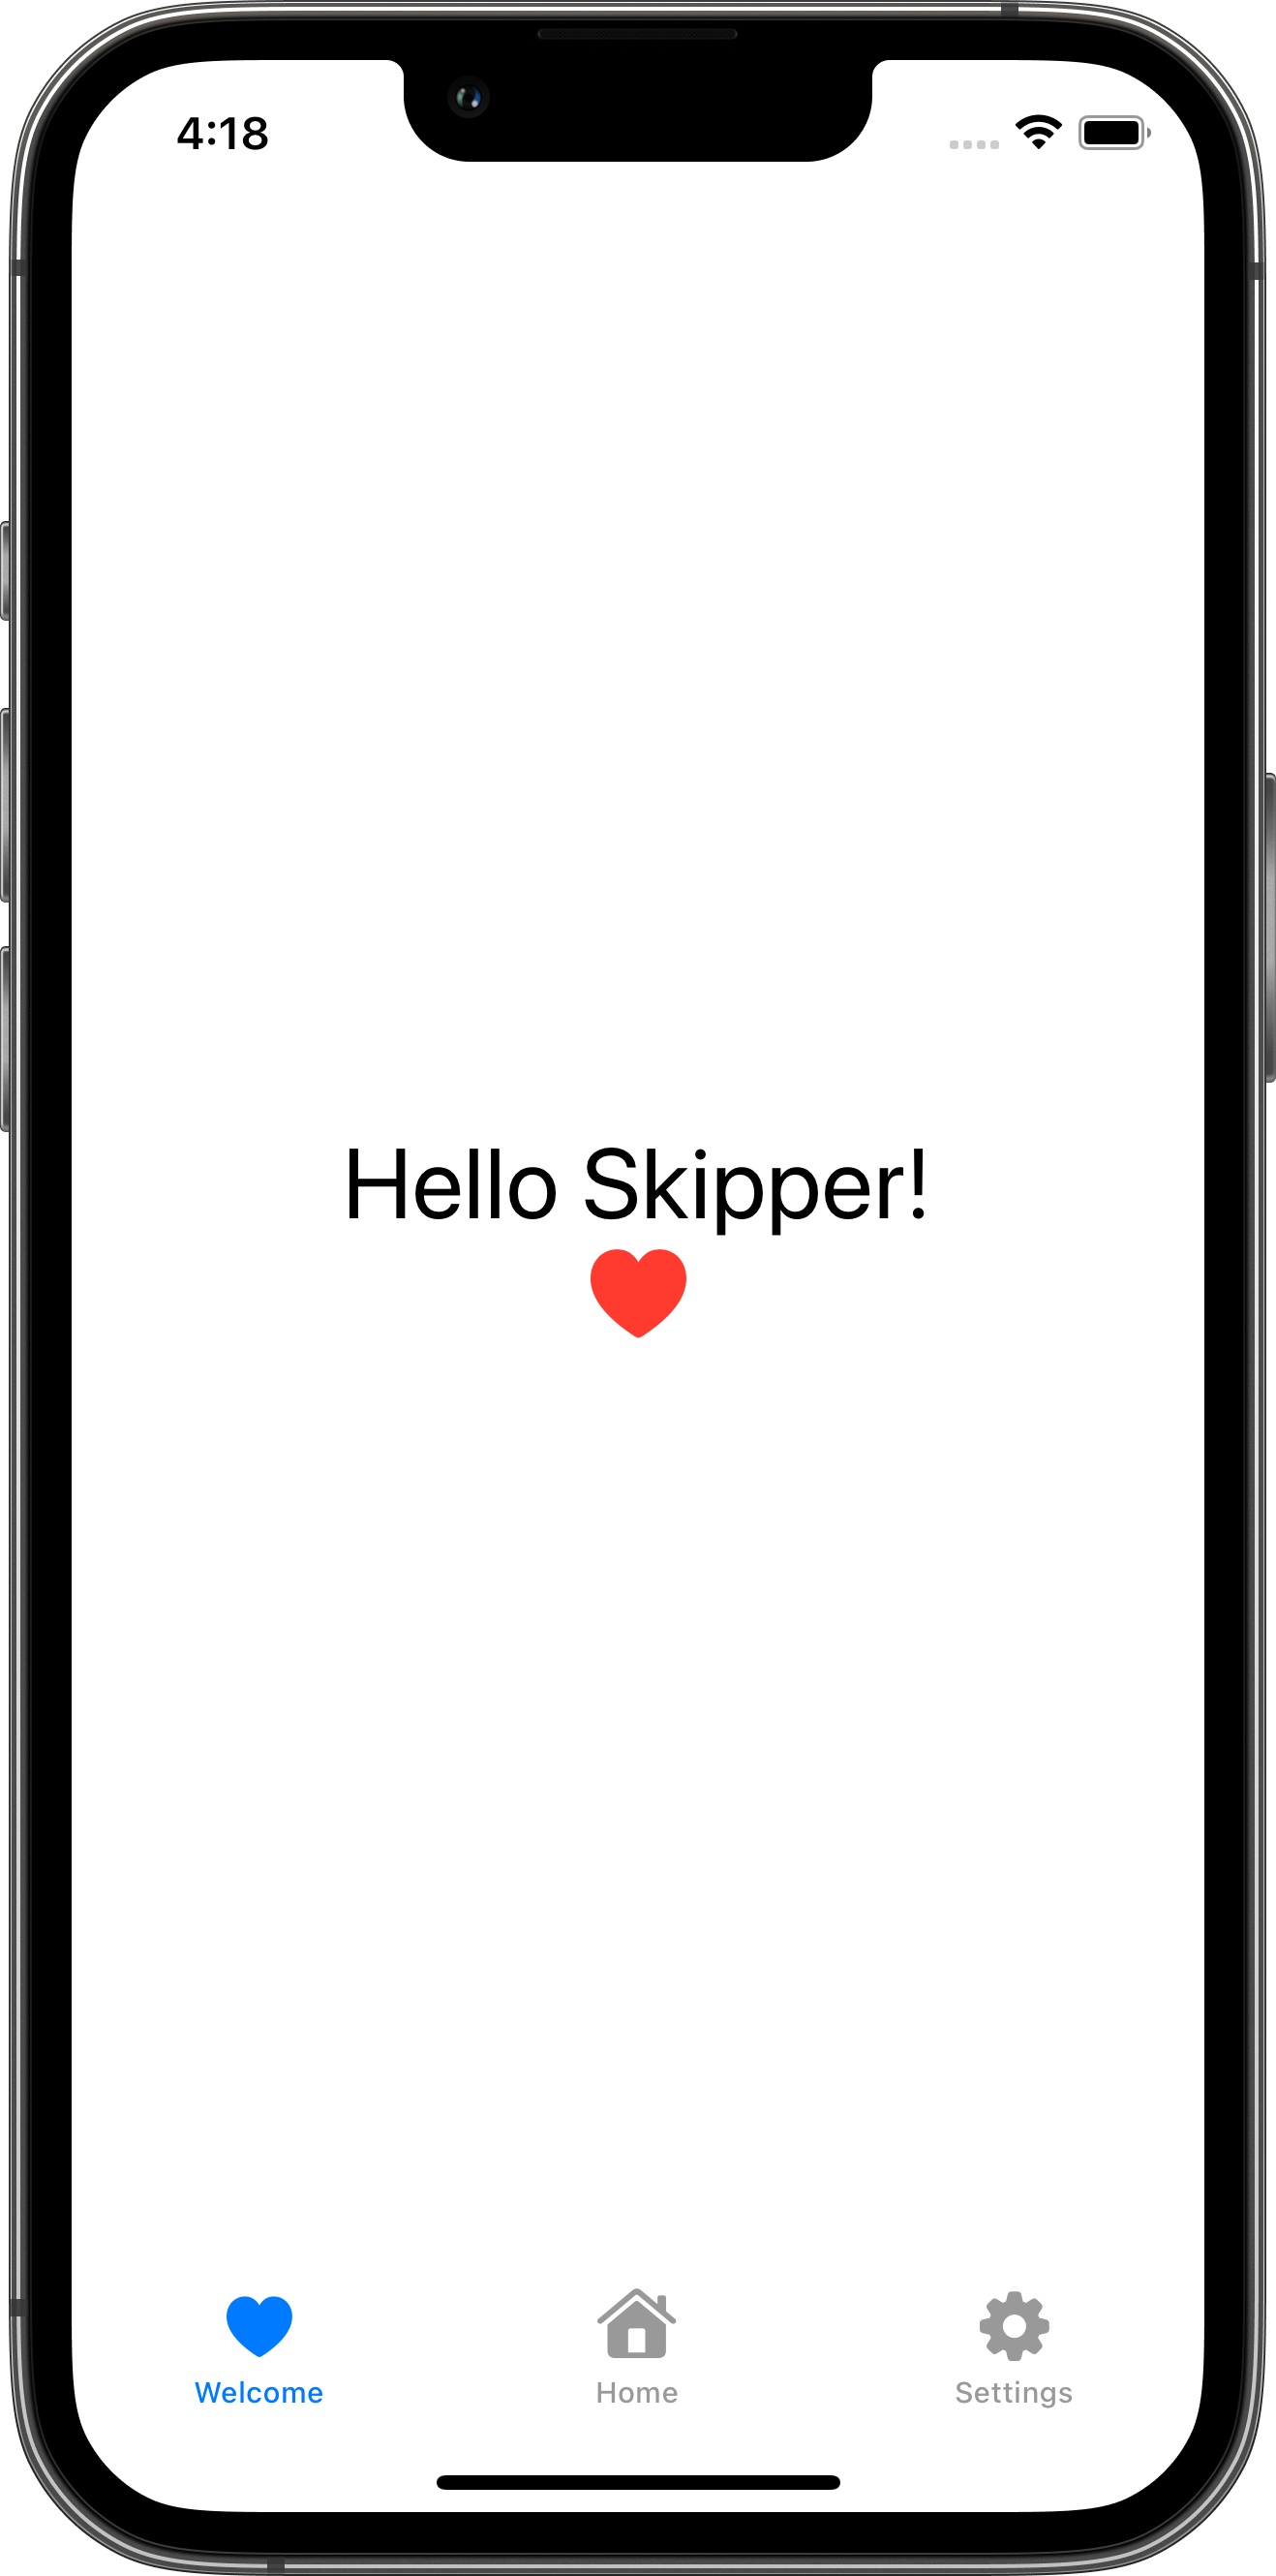
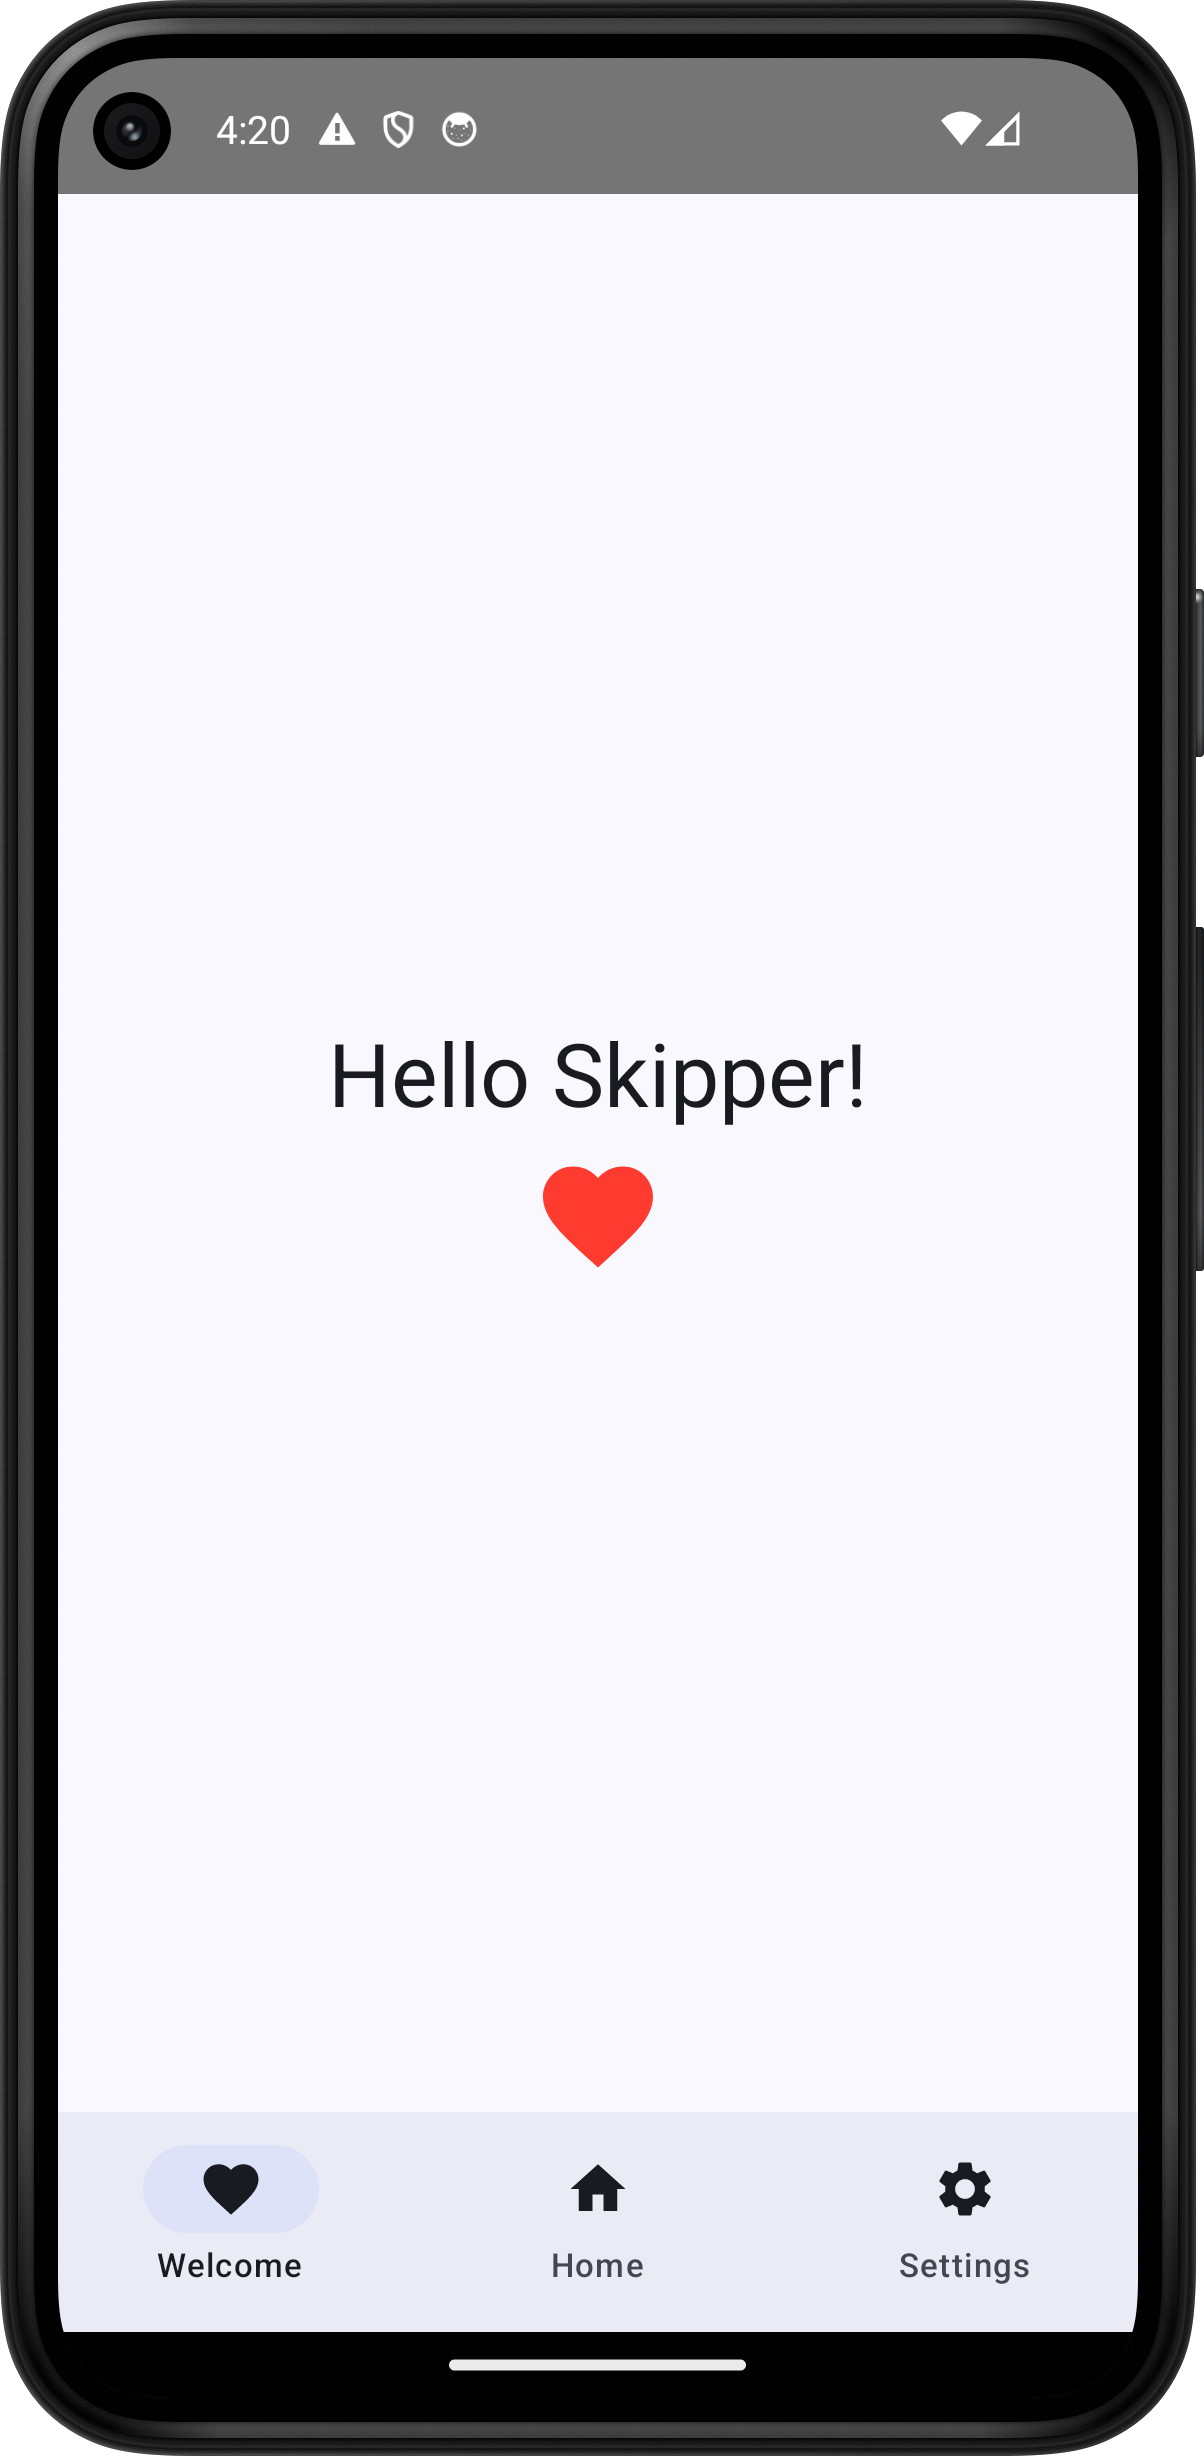
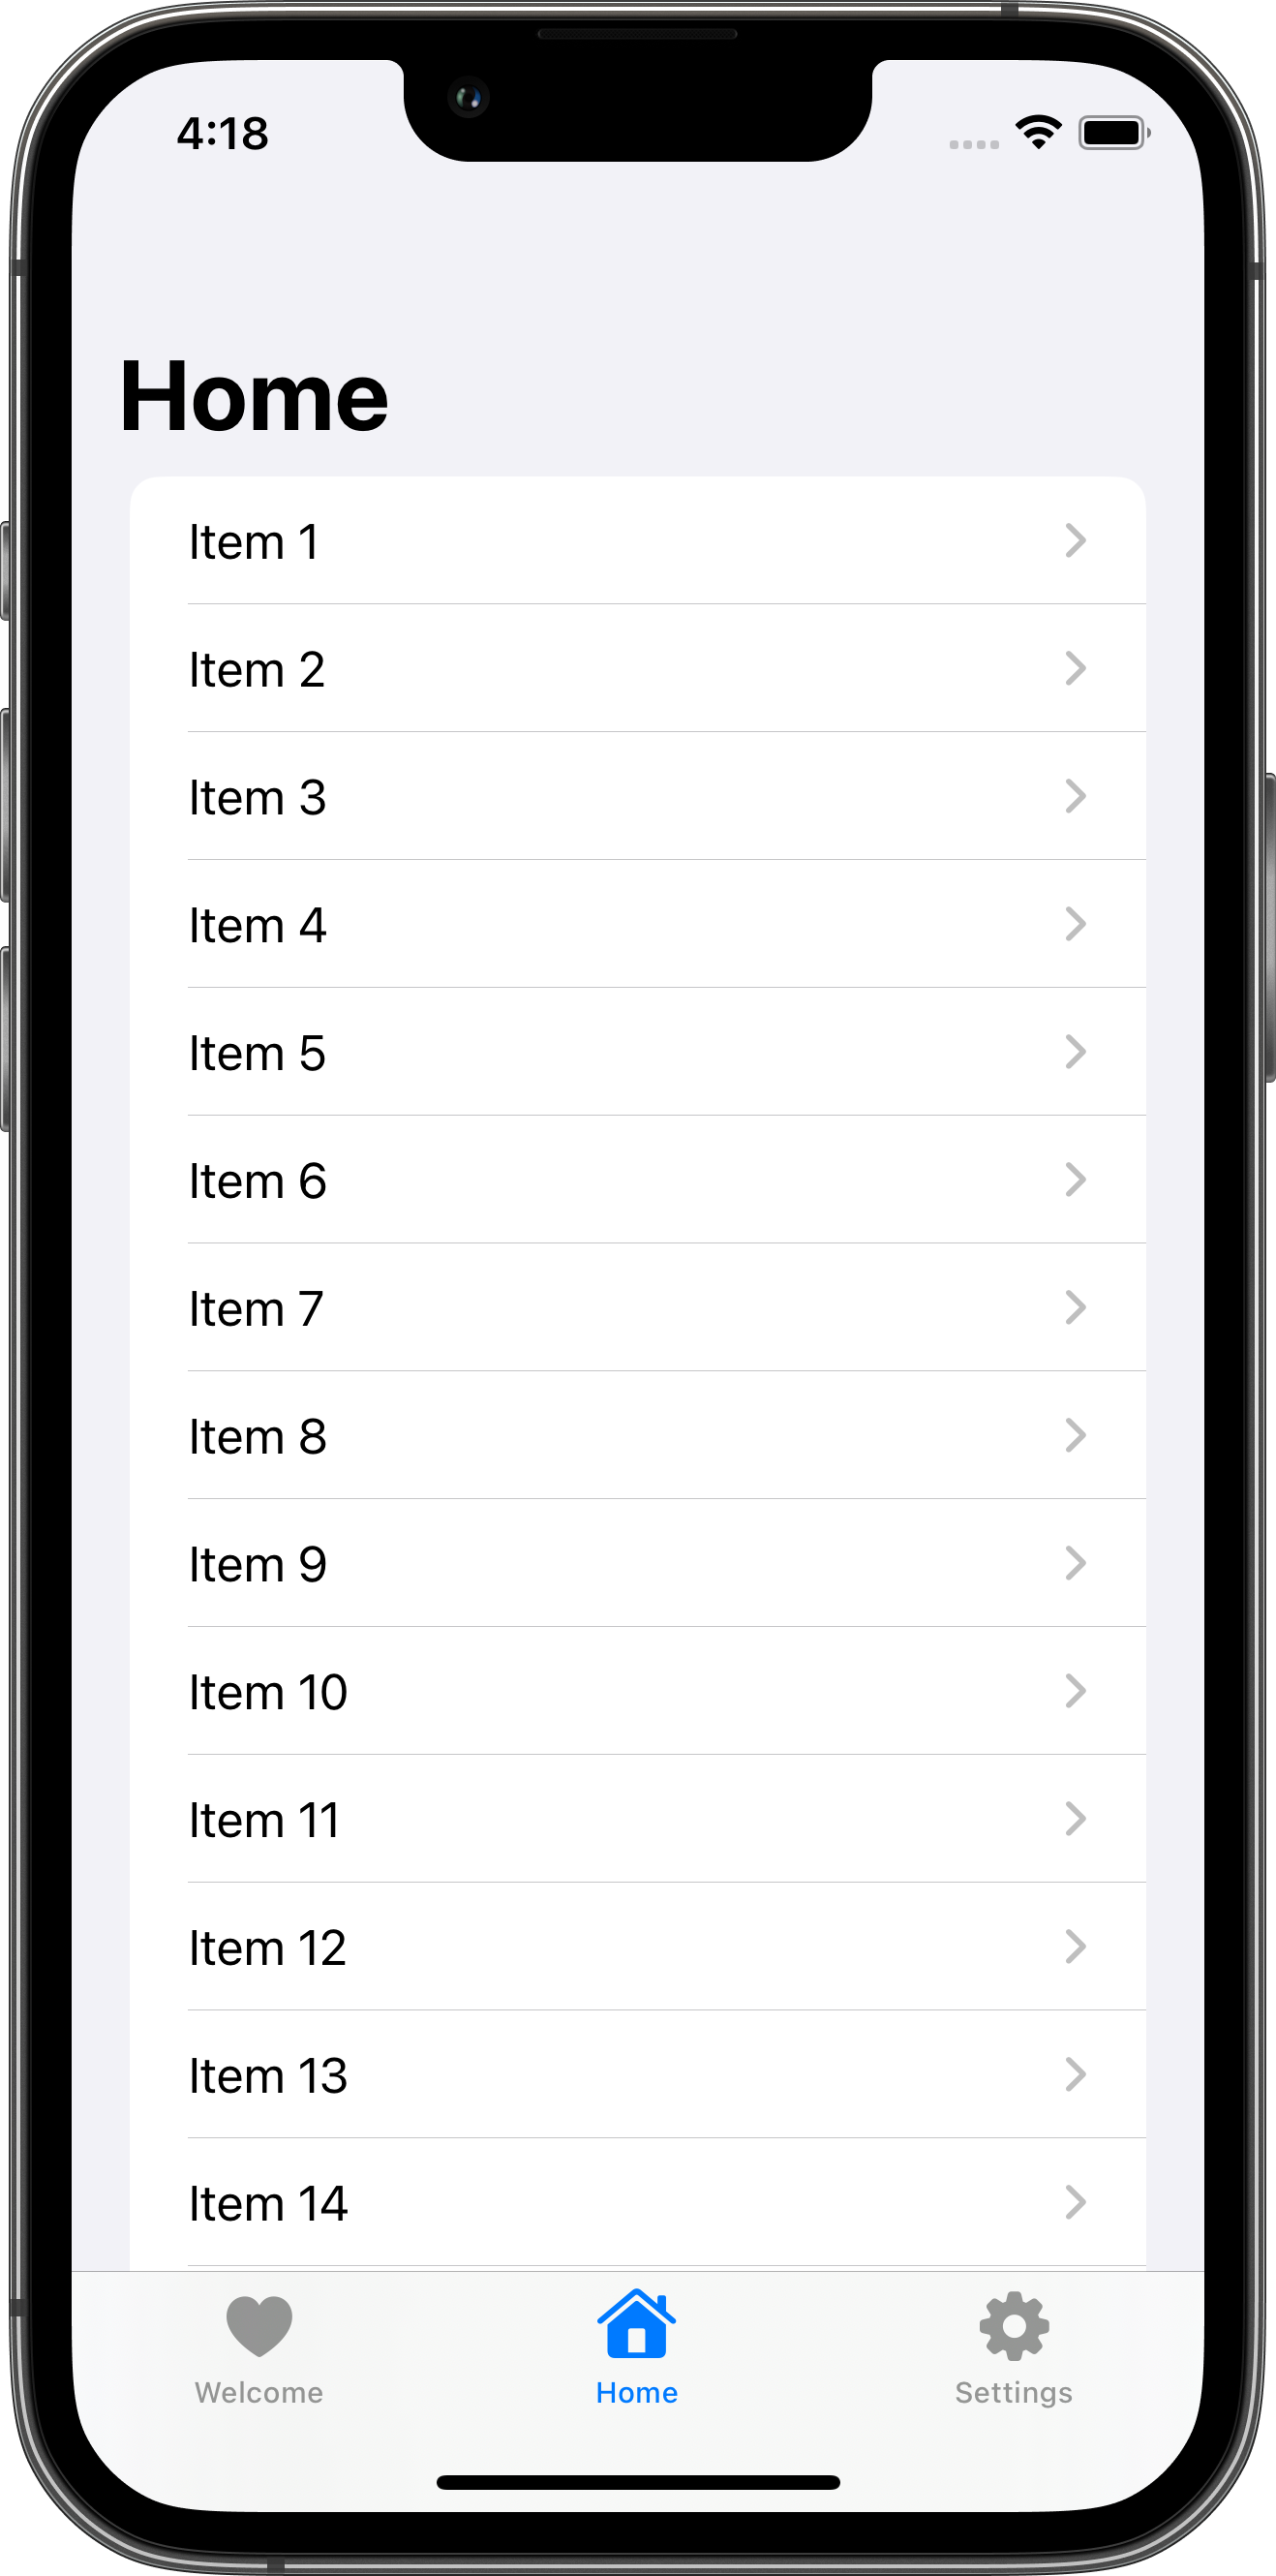
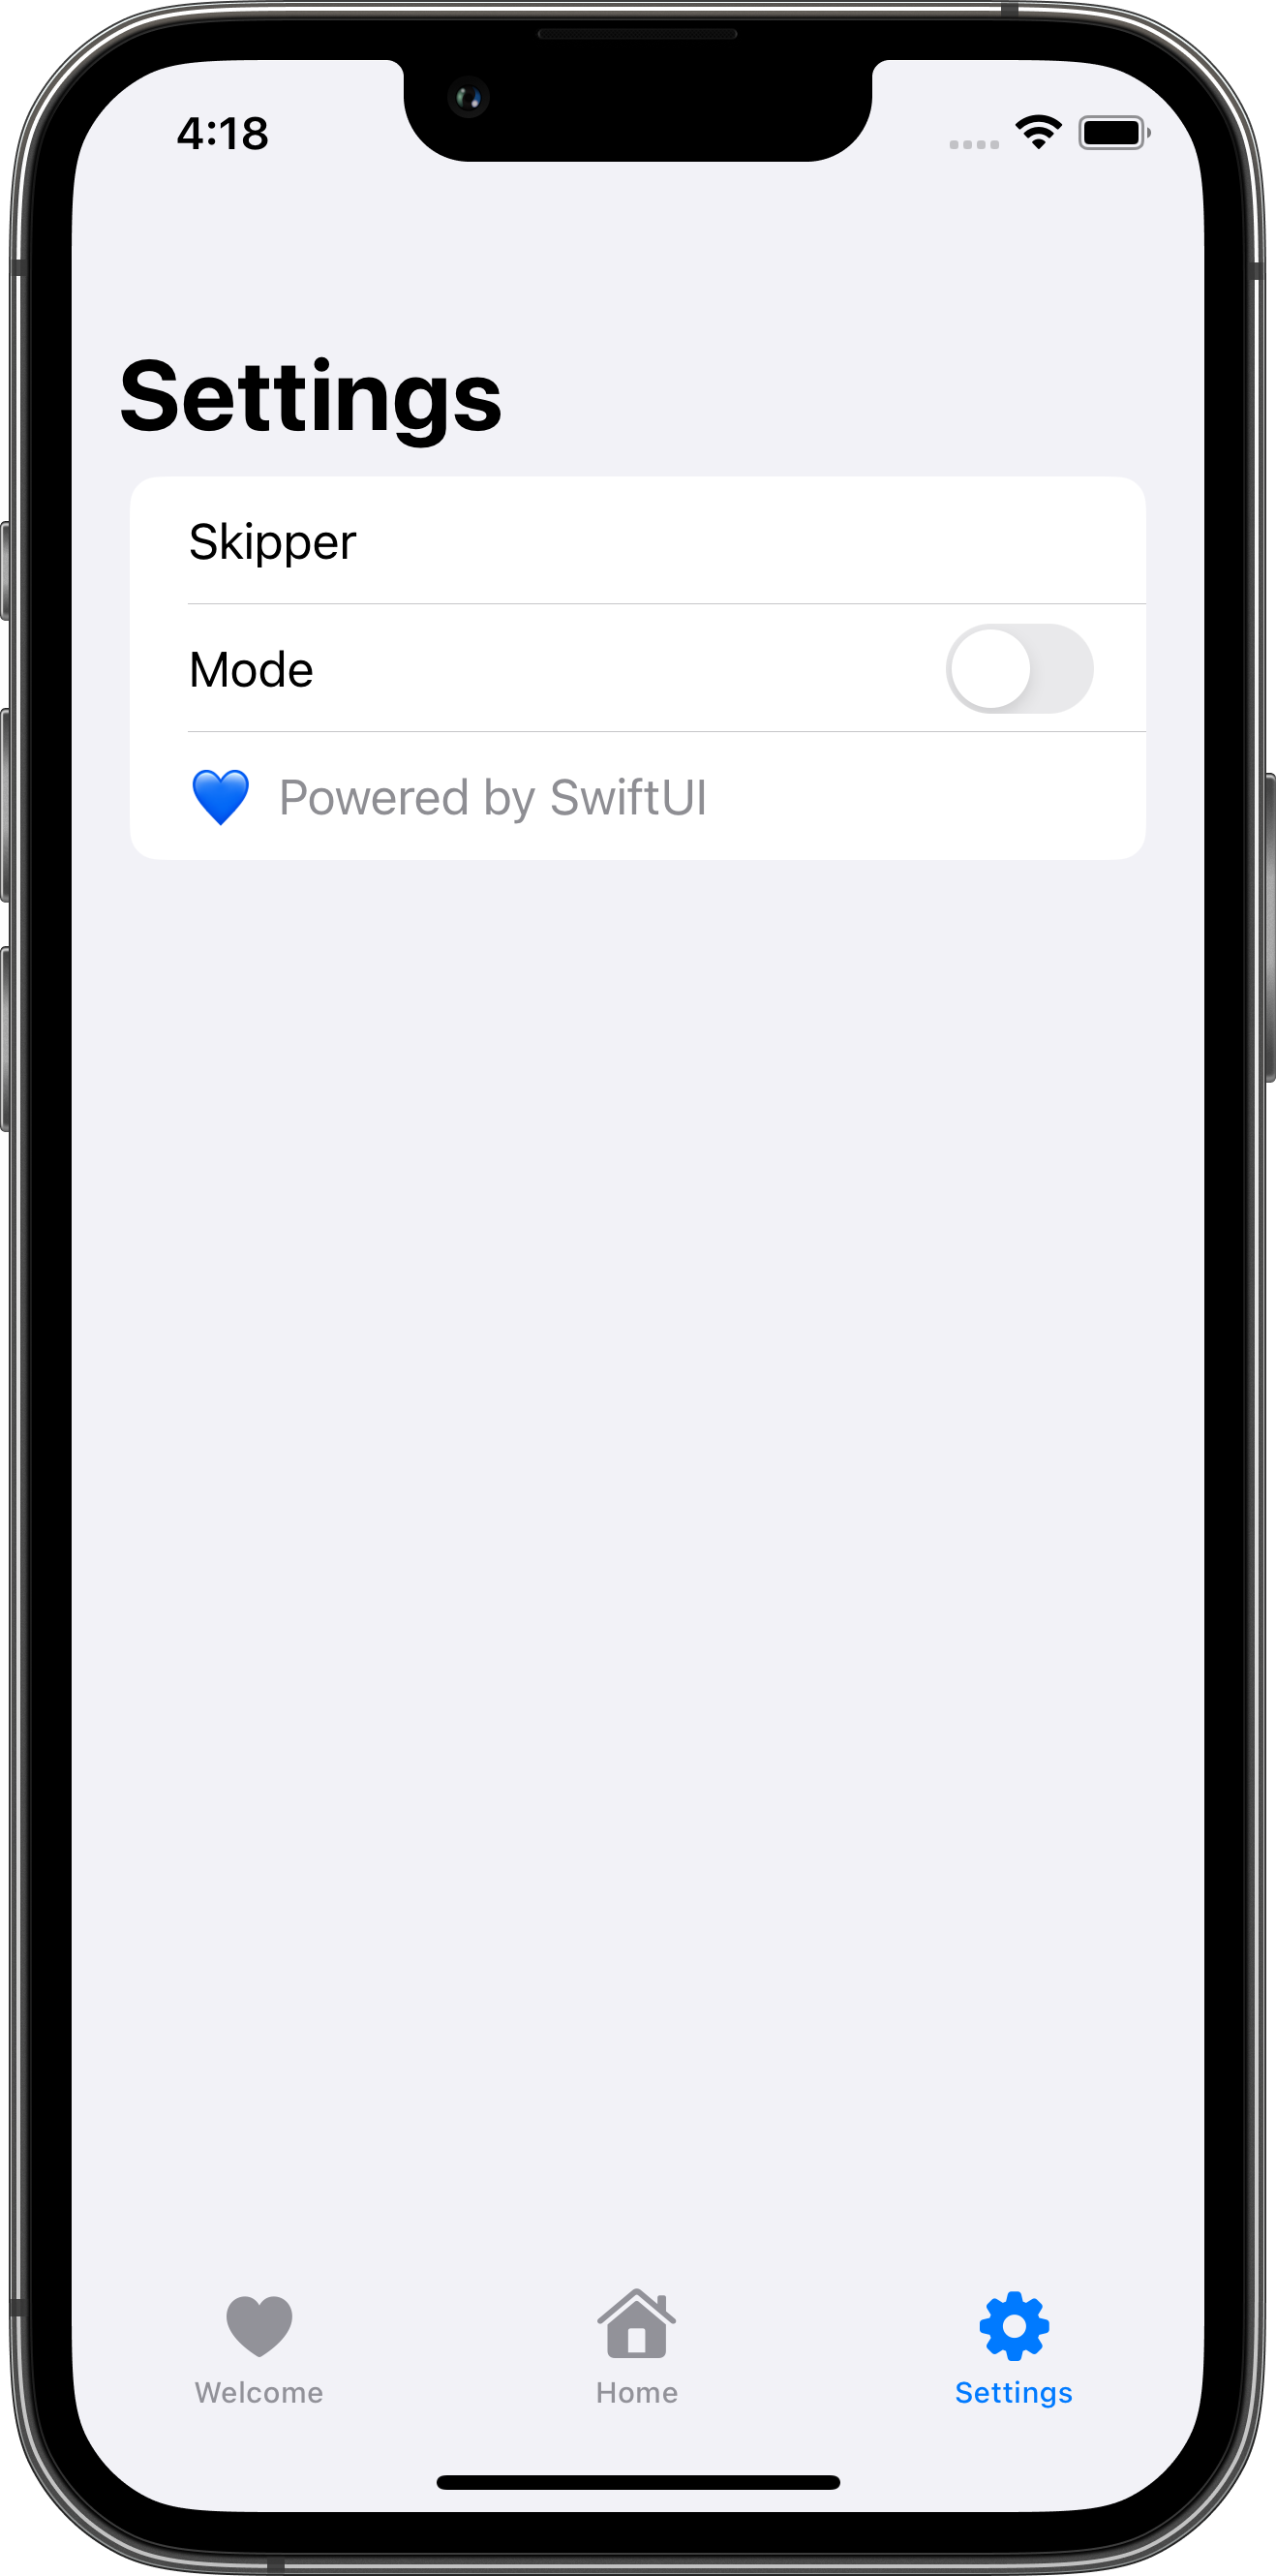
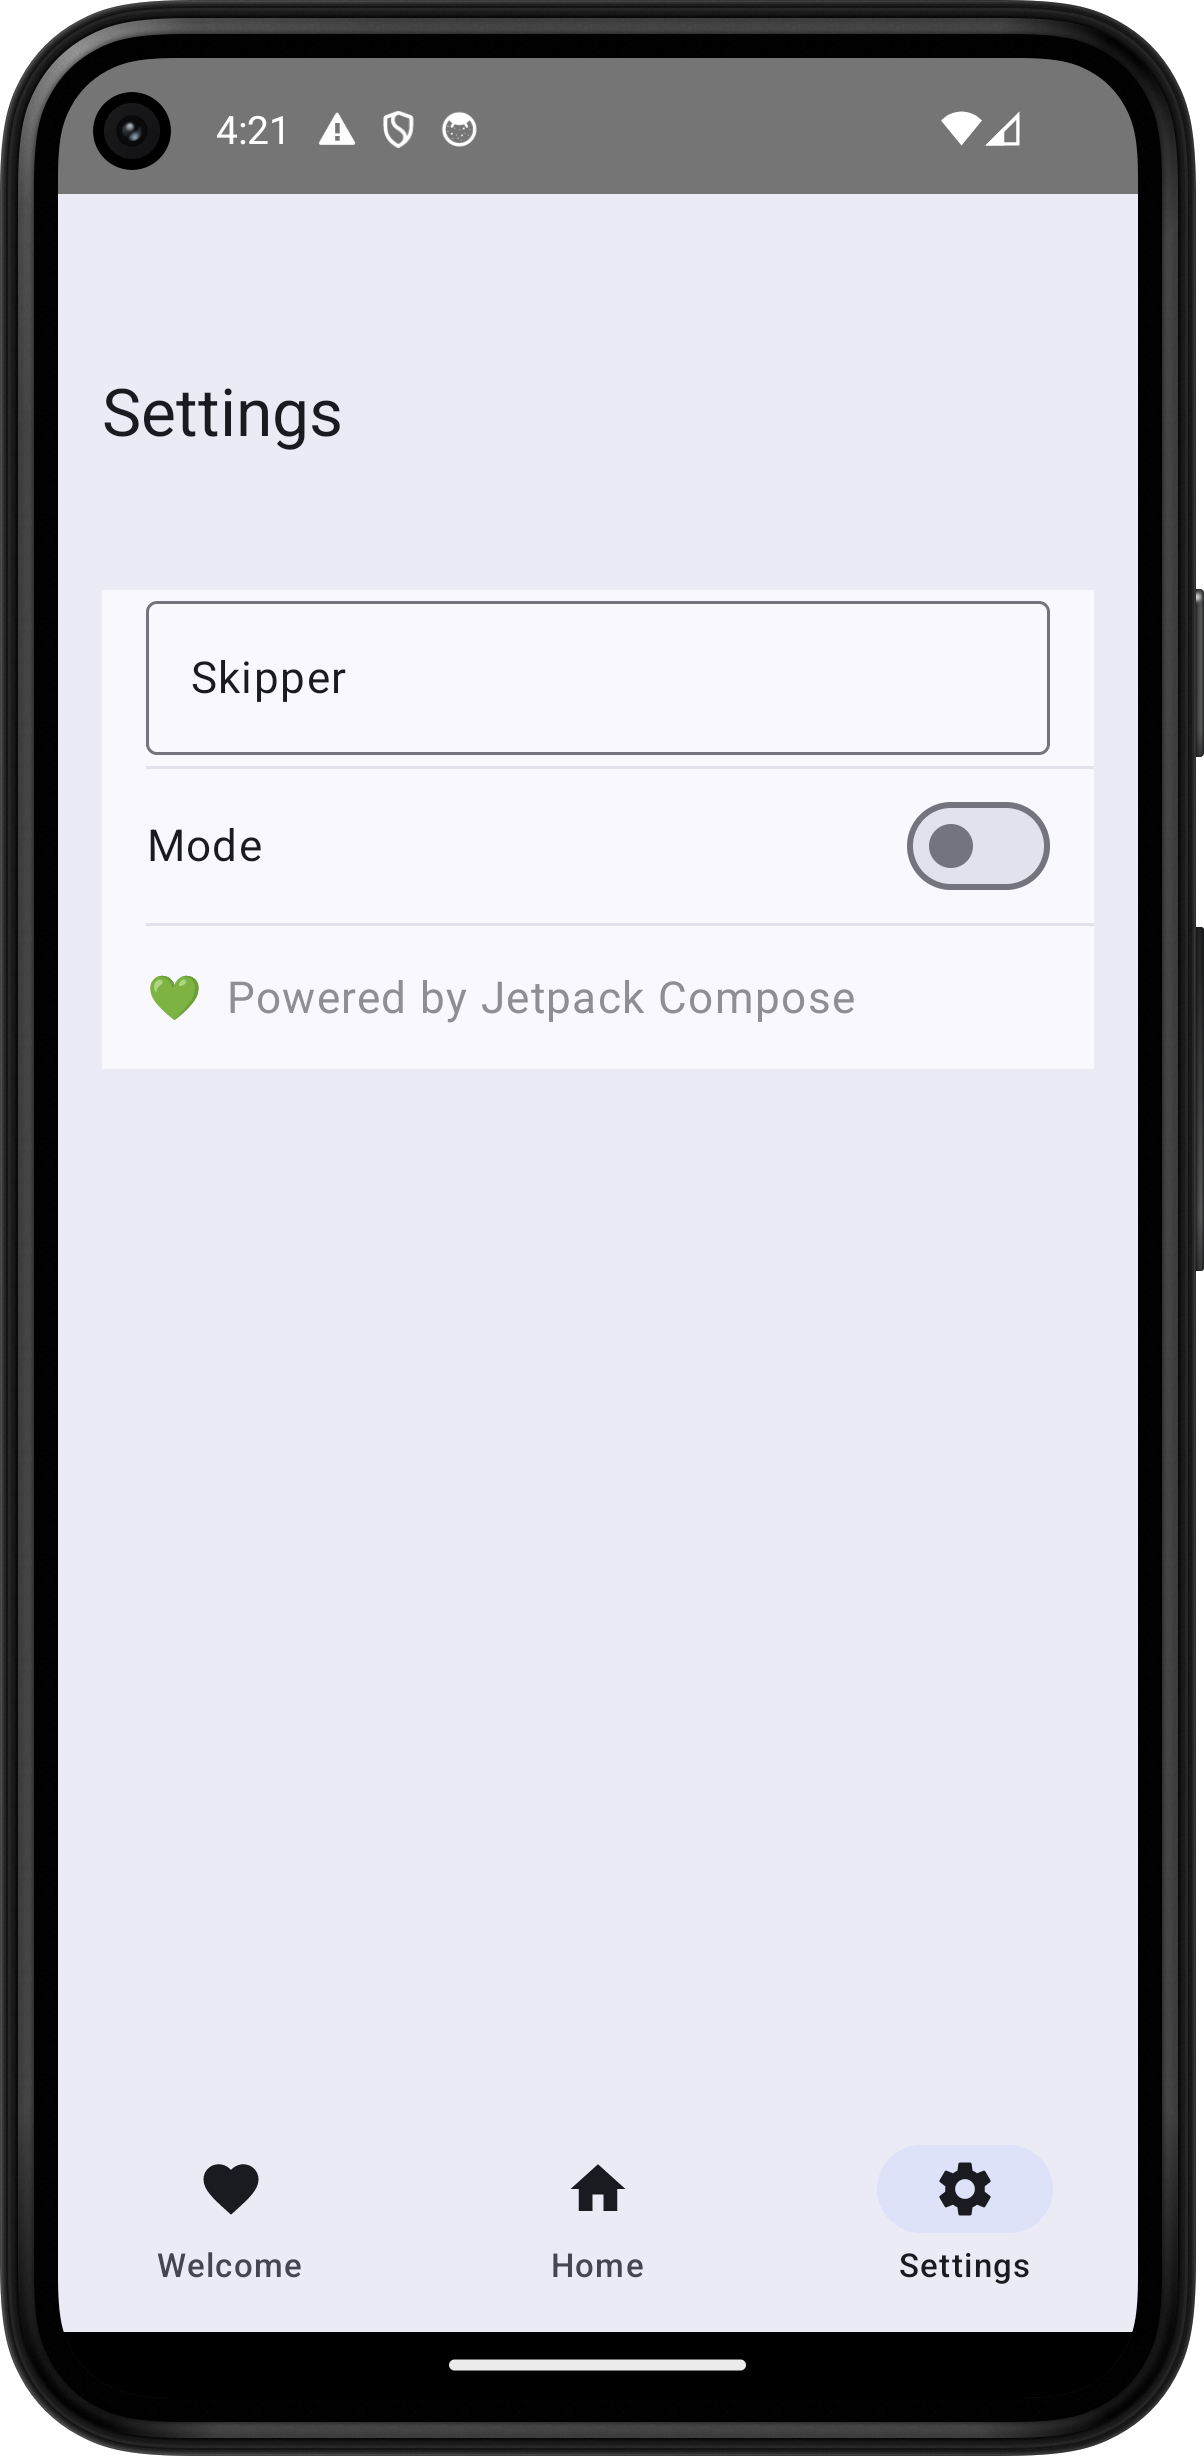
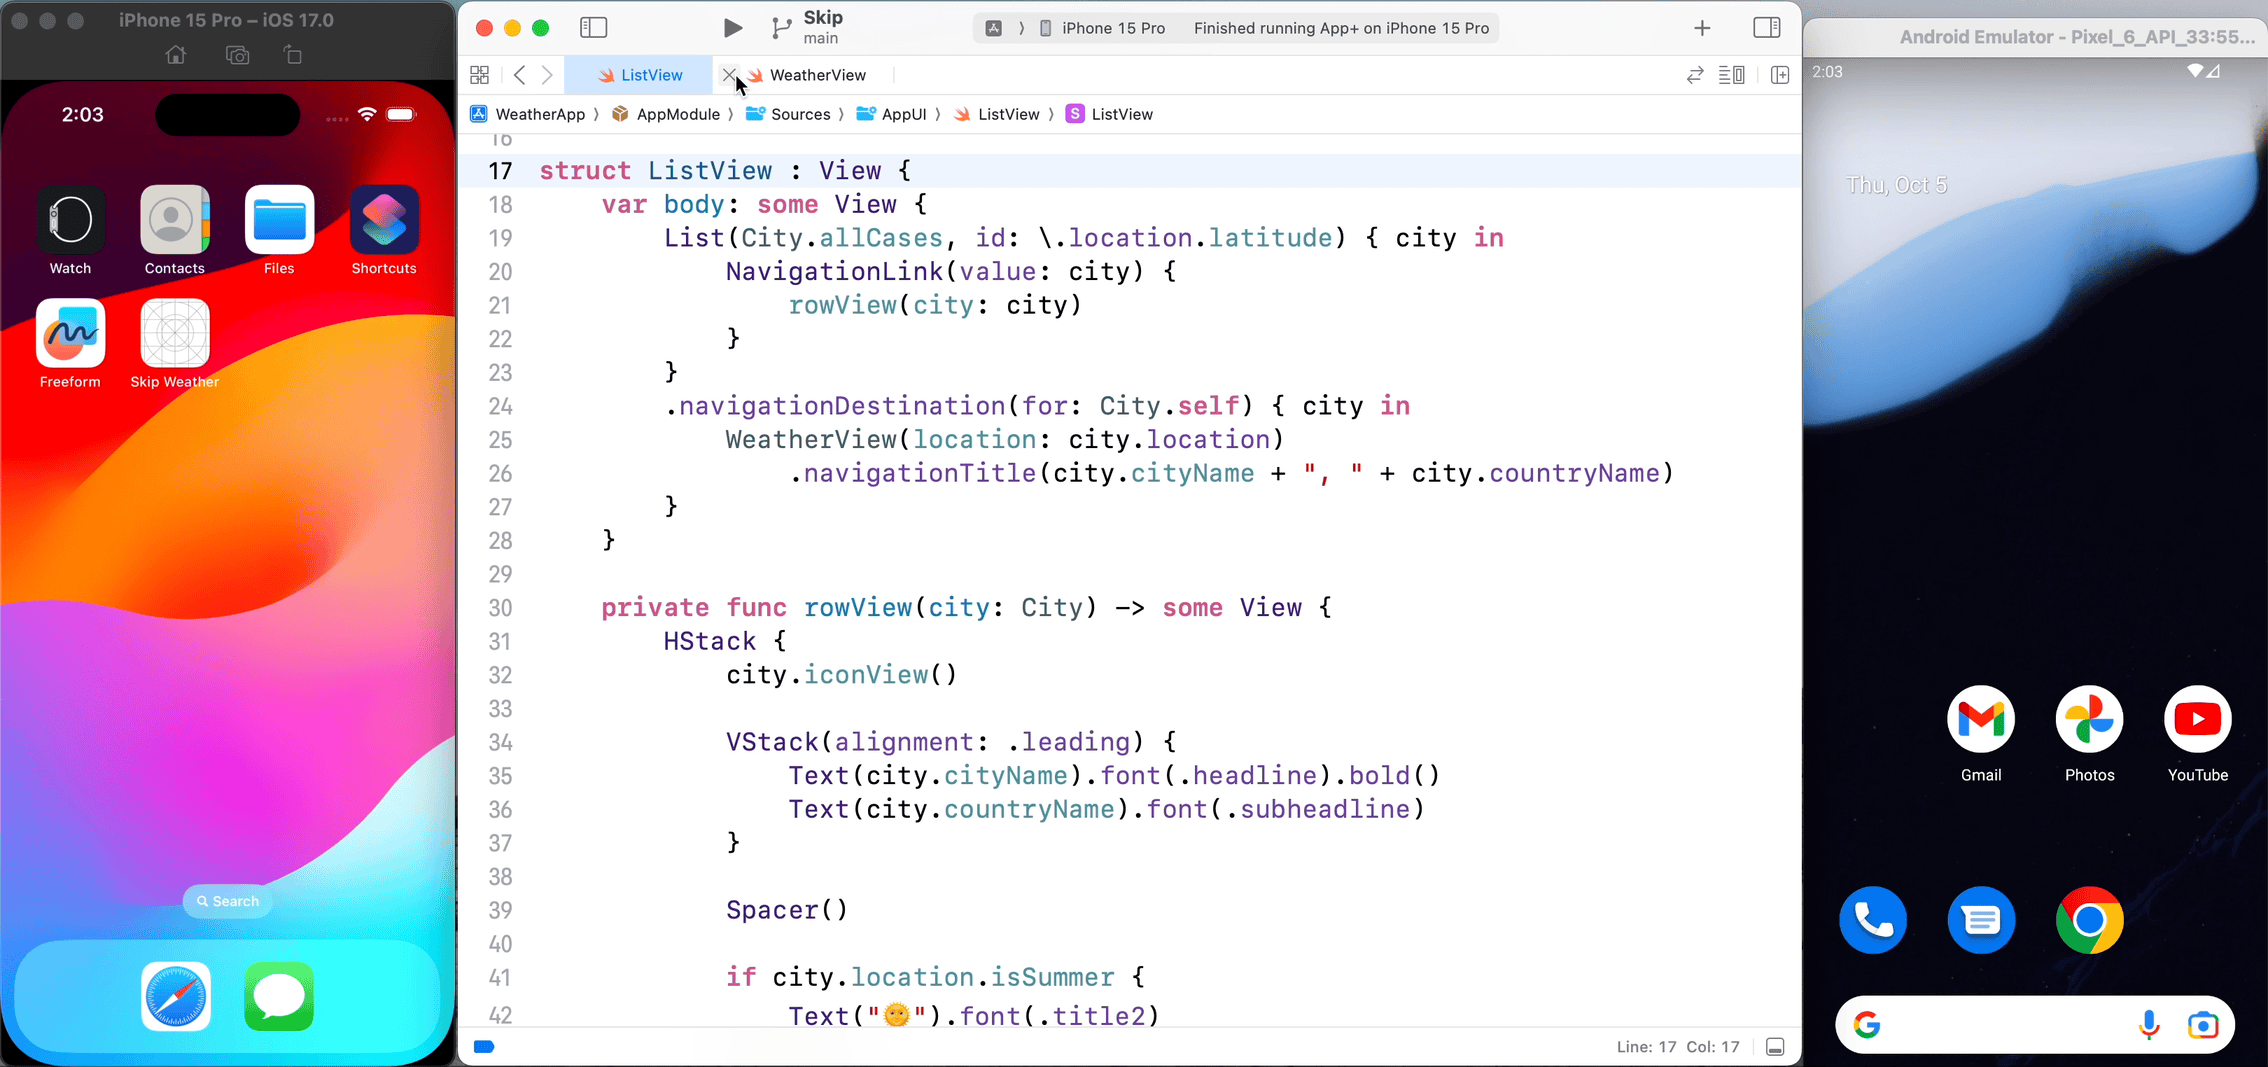
As you build your Swift and SwiftUI app in Xcode, the SkipStone Xcode plugin continuously transpiles it into the equivalent Kotlin and Jetpack Compose for Android. Develop dual-platform libraries or entire apps, with native performance and native user interfaces on both platforms.
Want to learn more? Take our video tour or browse the documentation.
Eager to try Skip out? Install Skip today!
Benefits of a Dual-Platform Skip App
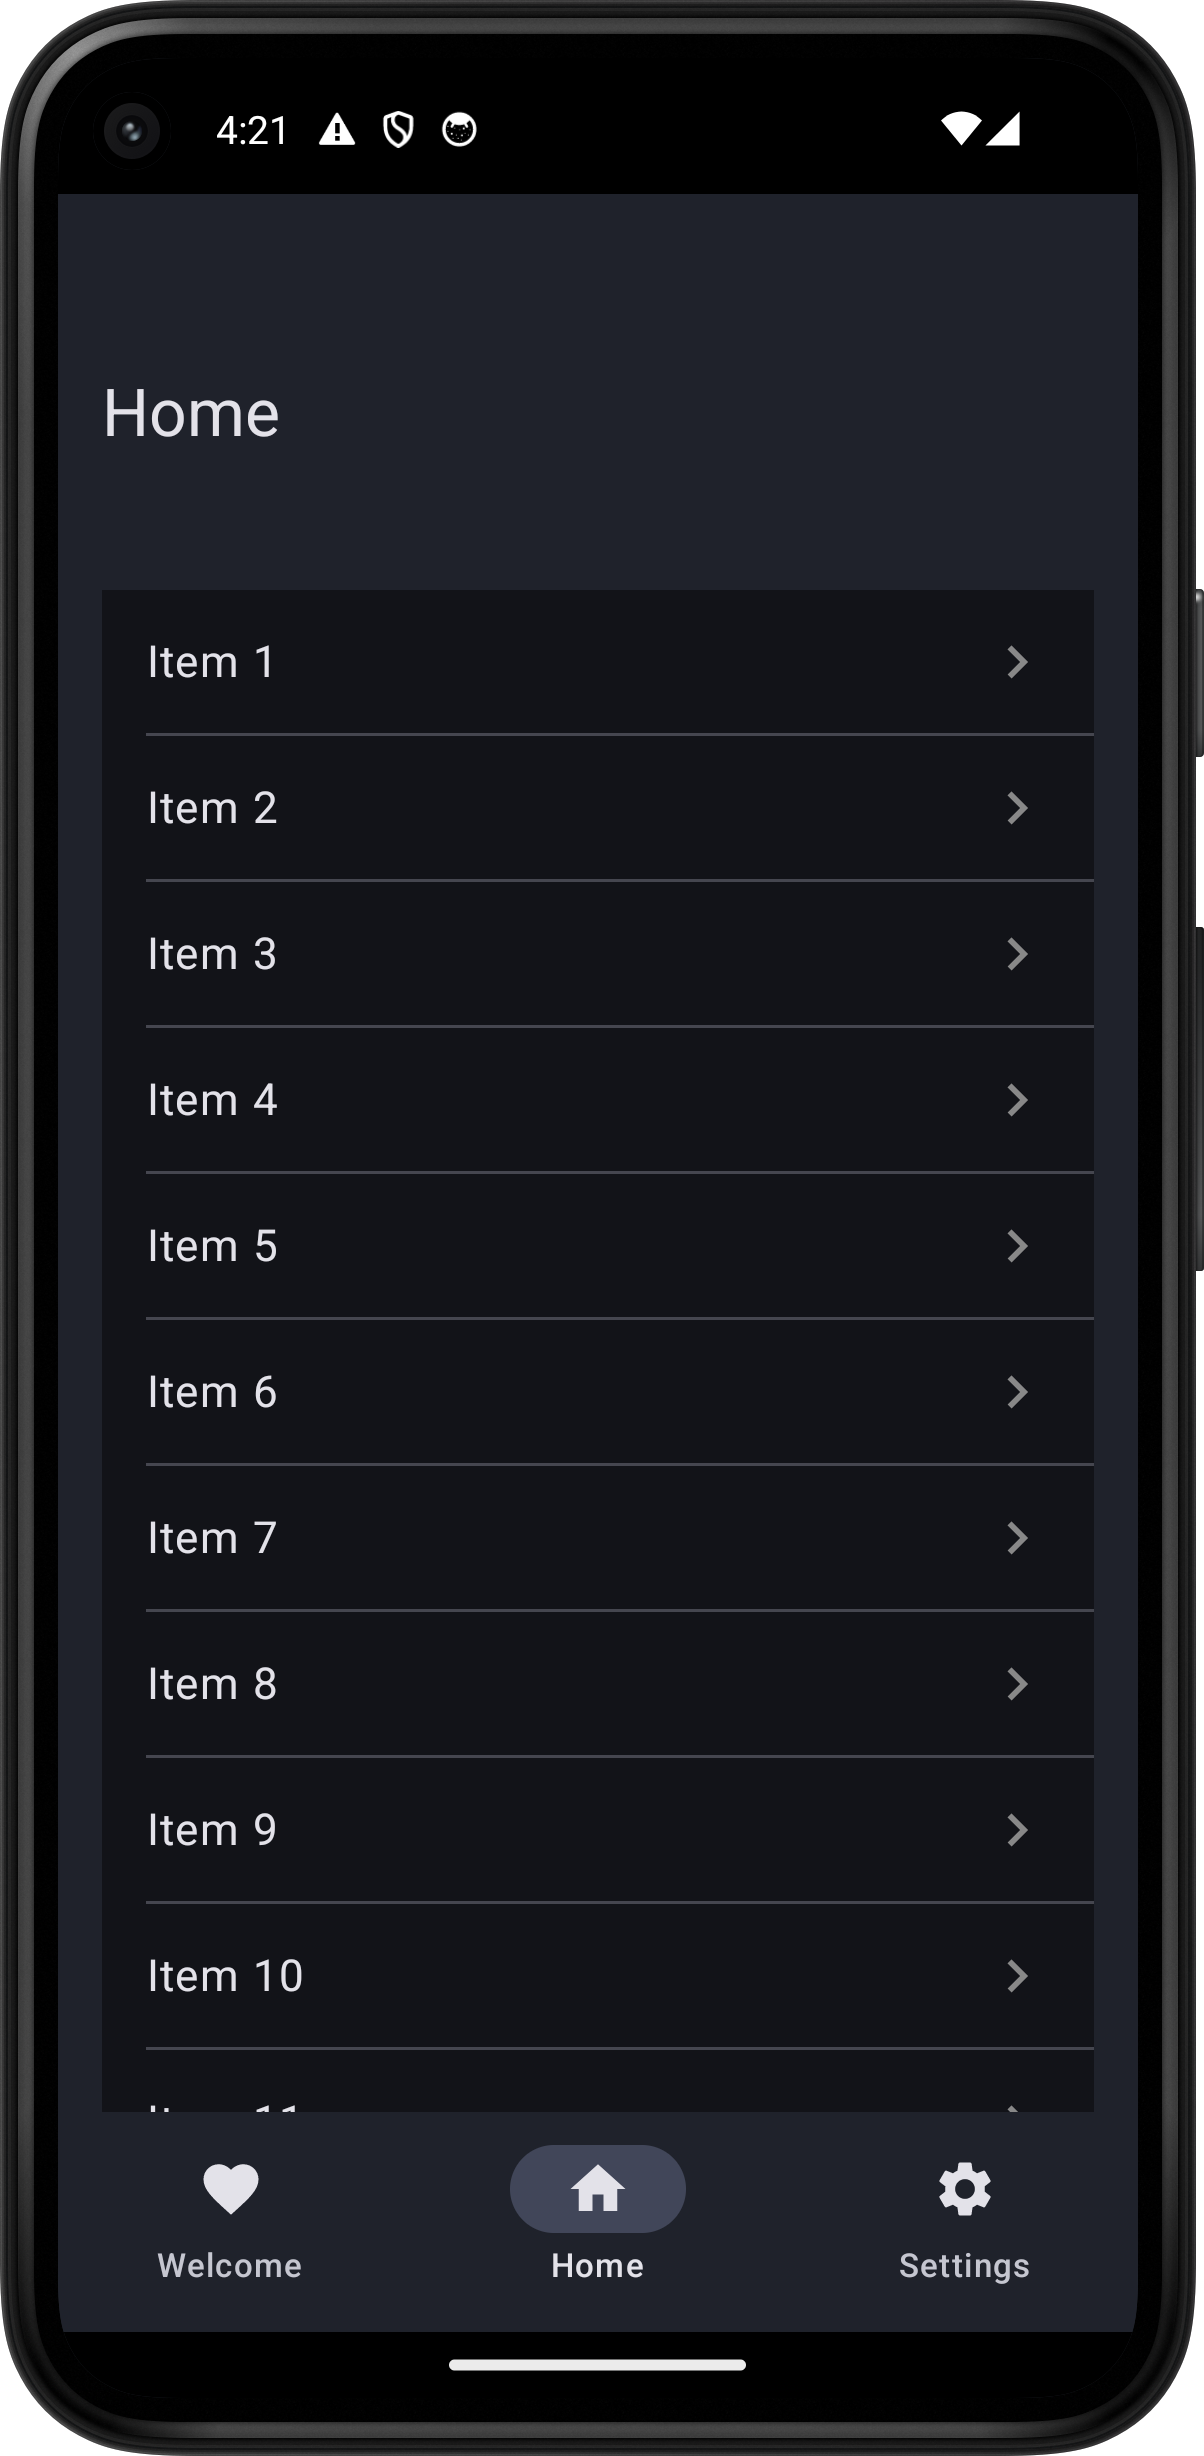
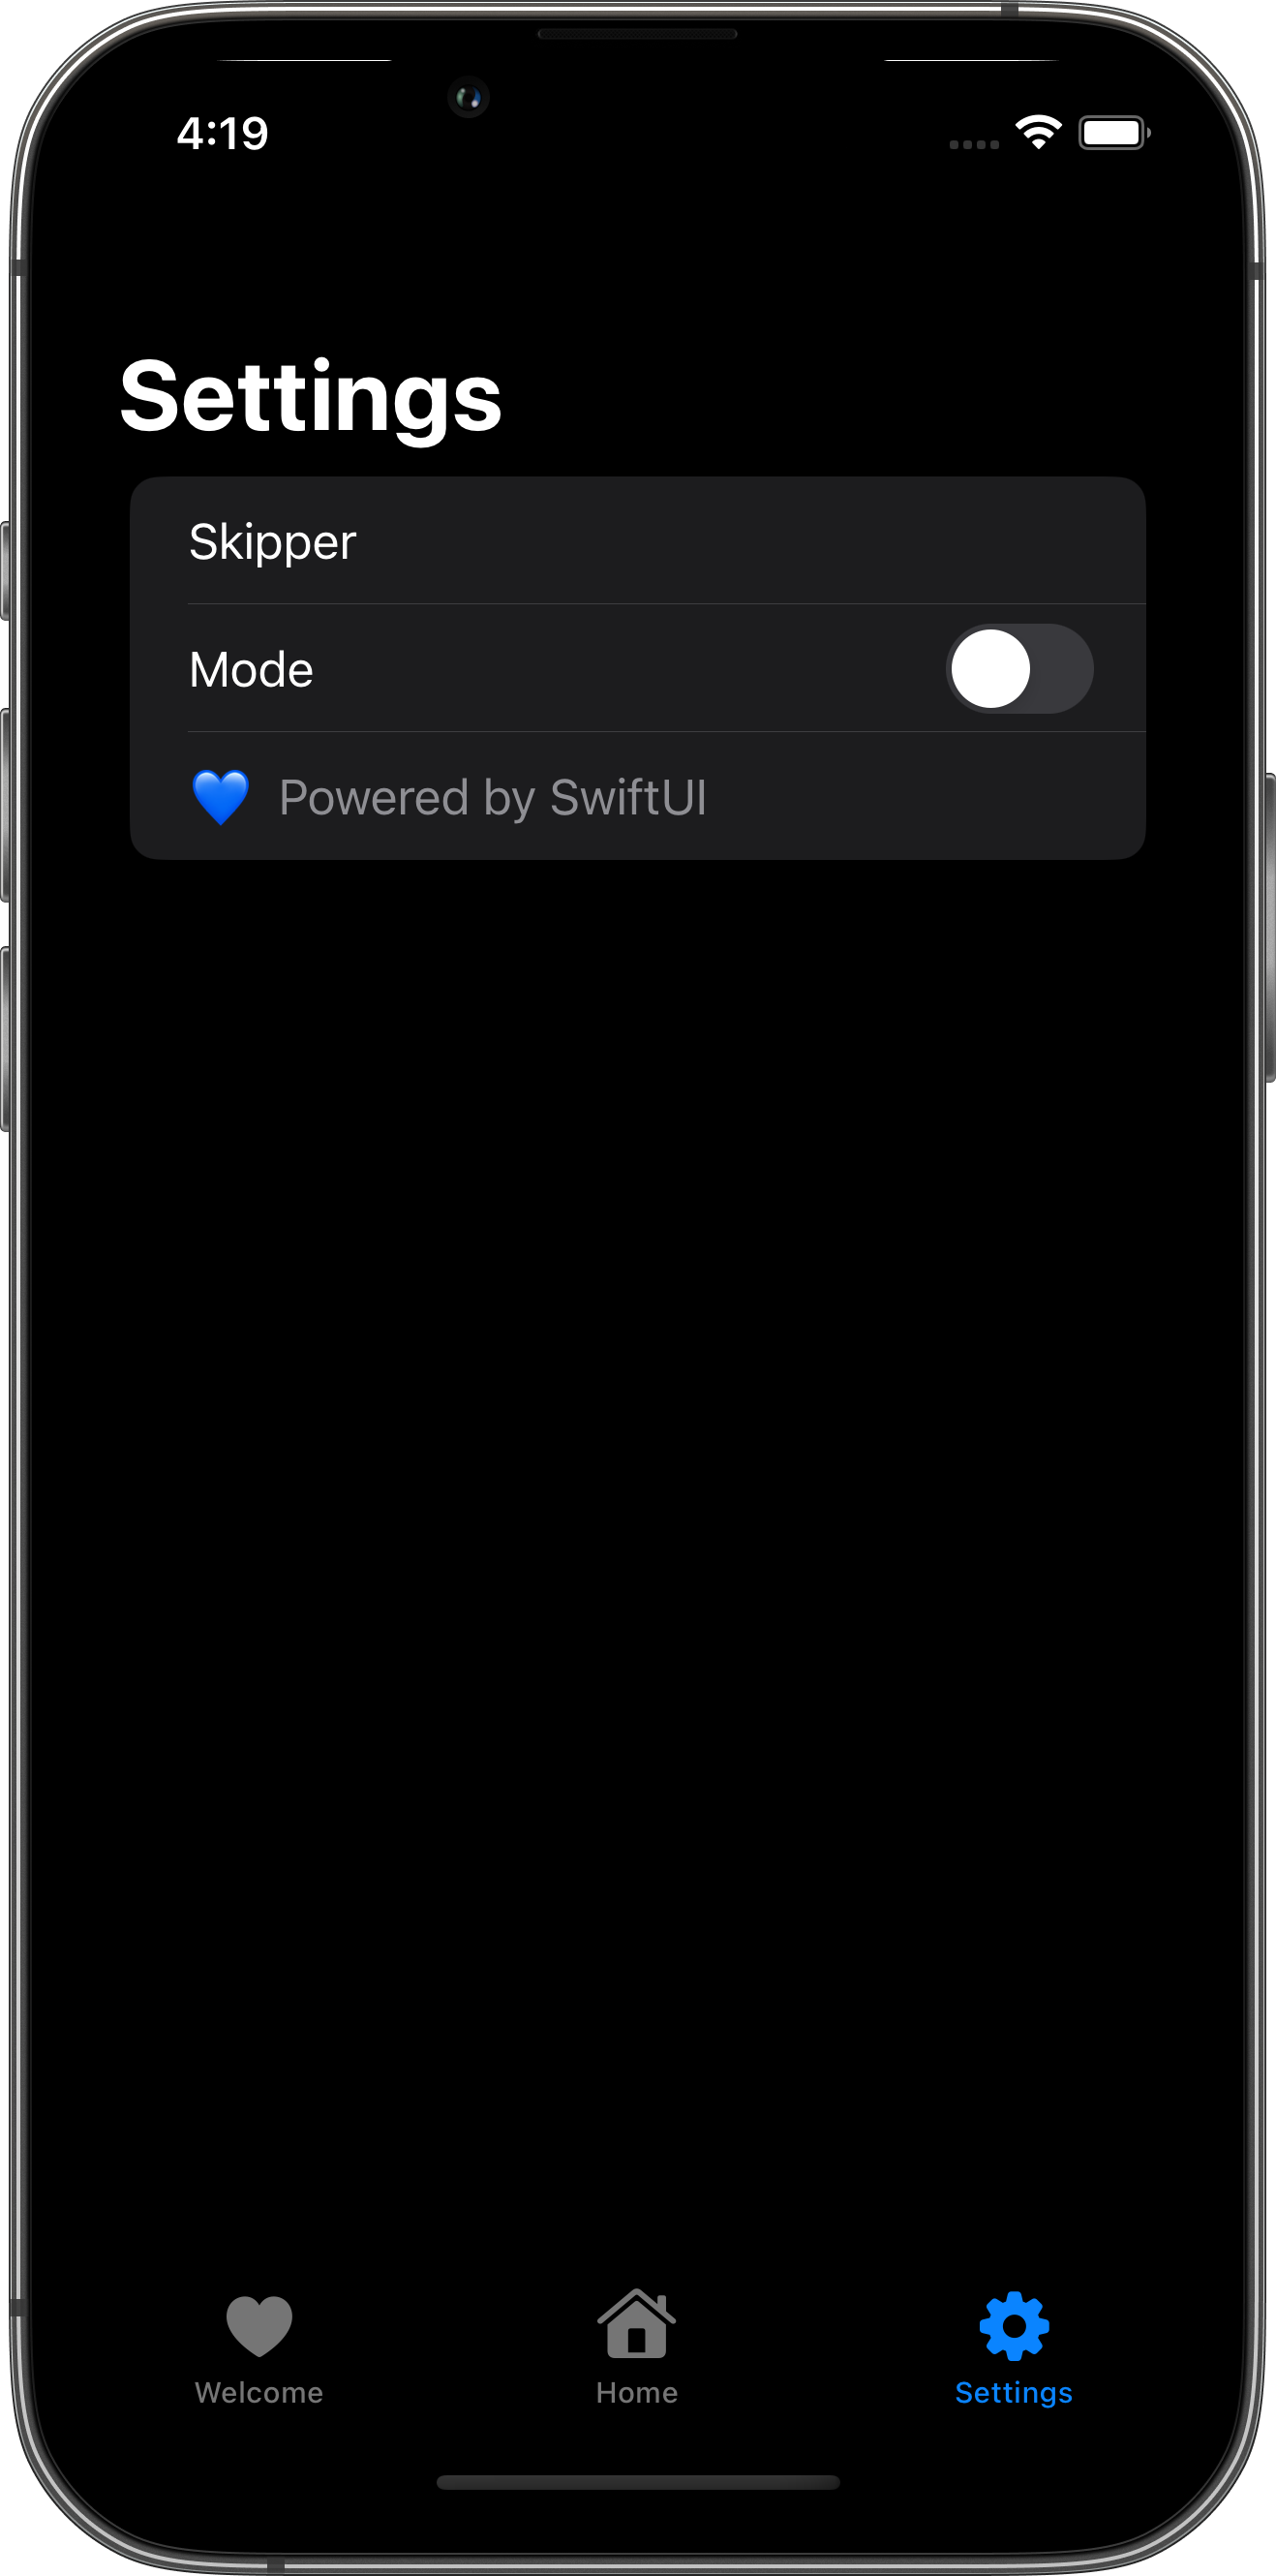
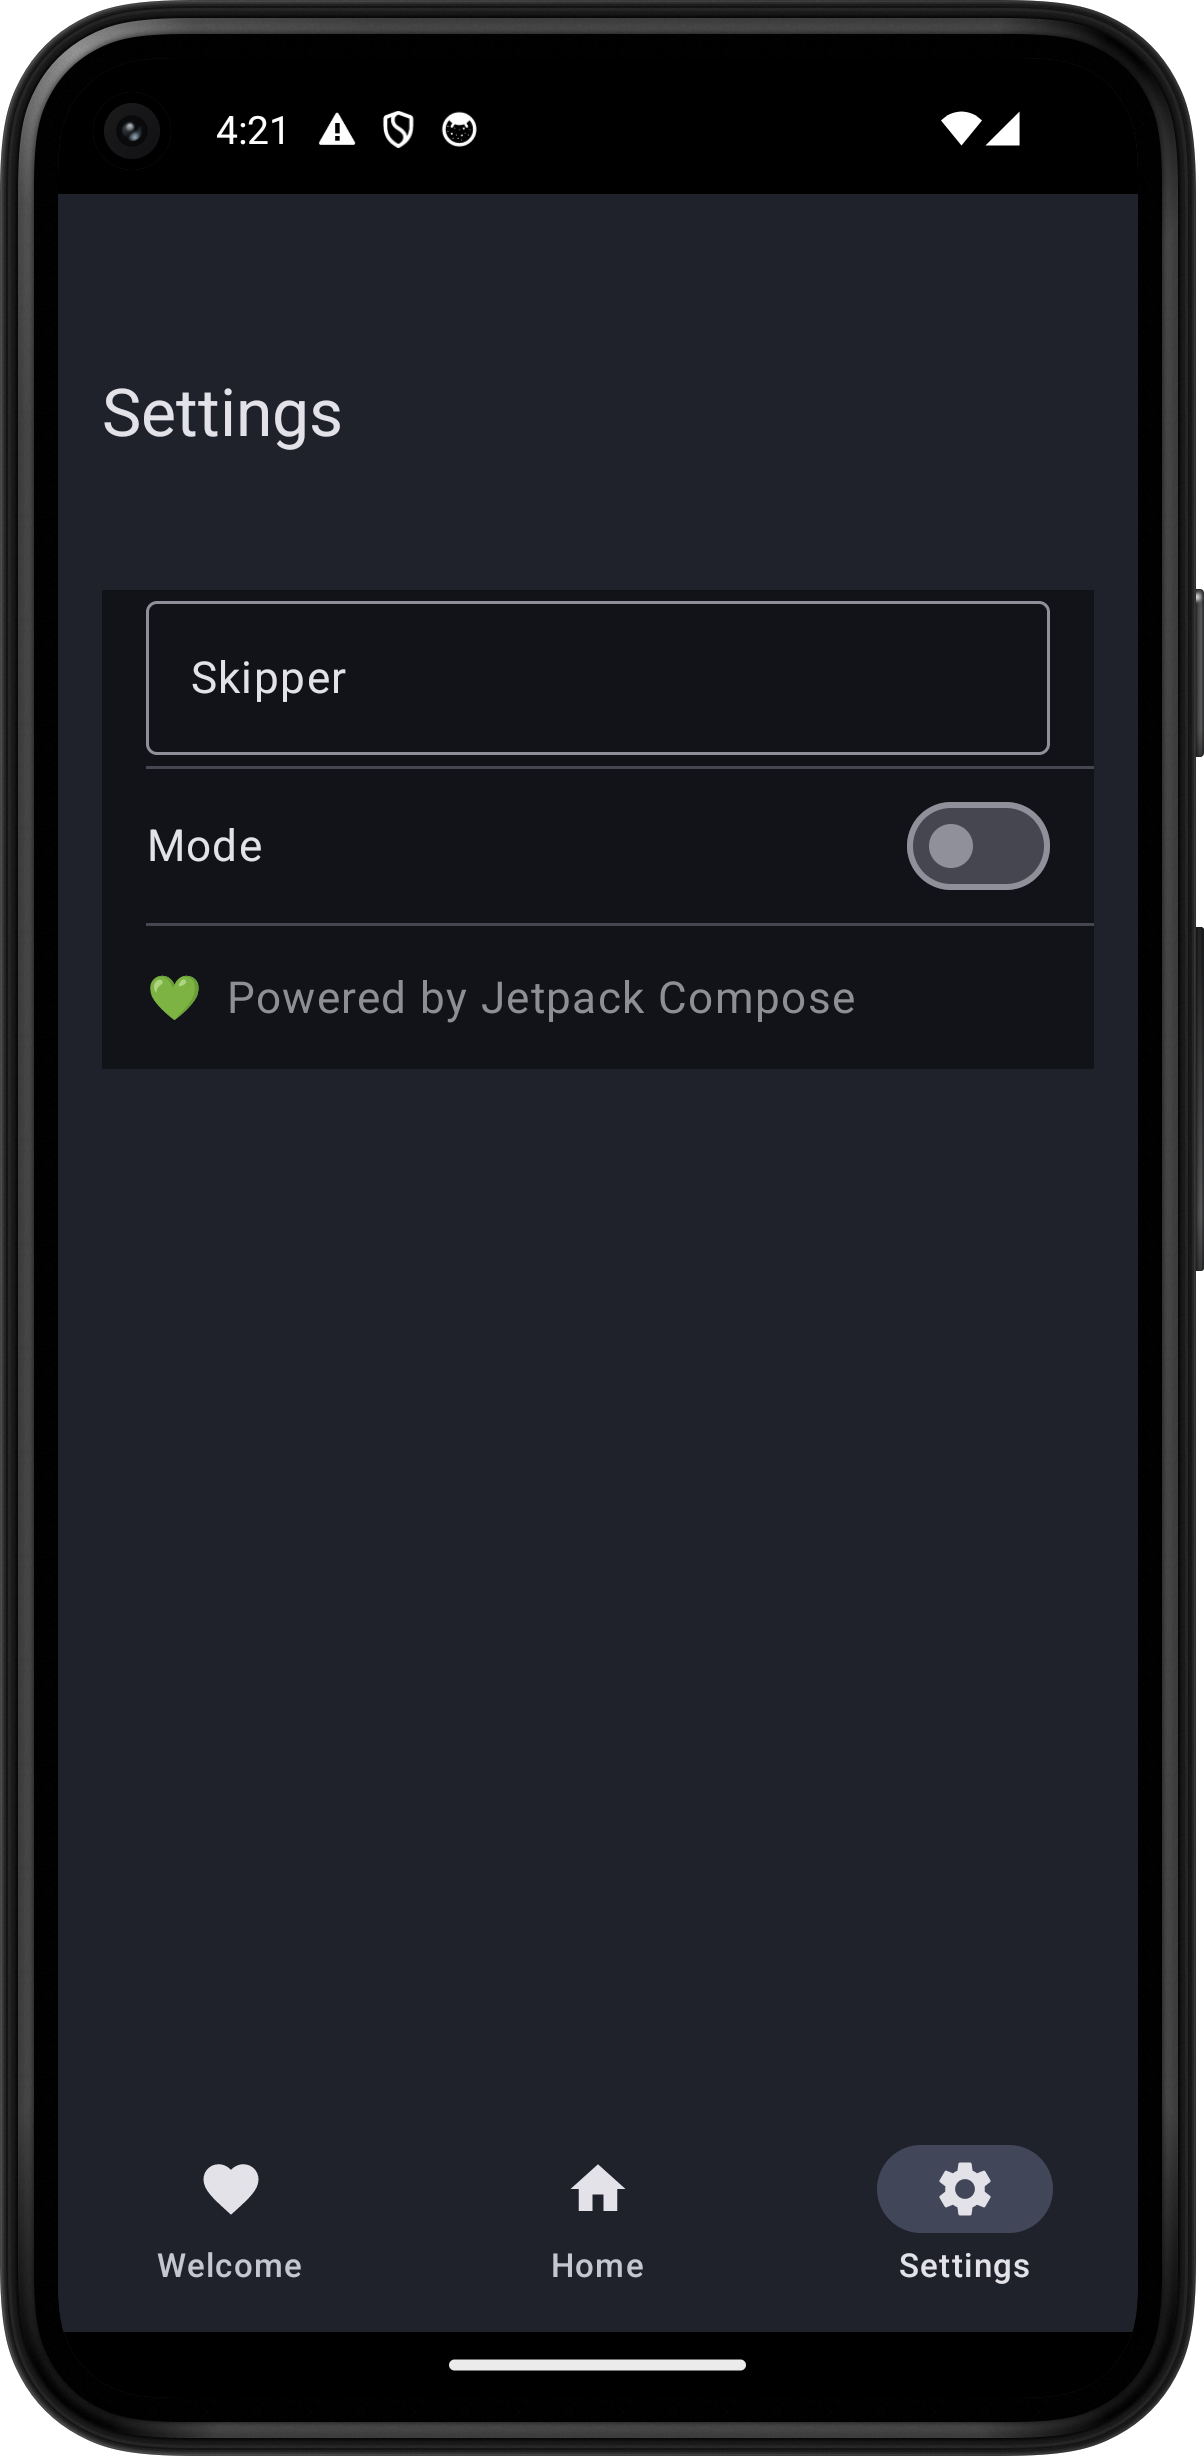
Genuinely Native
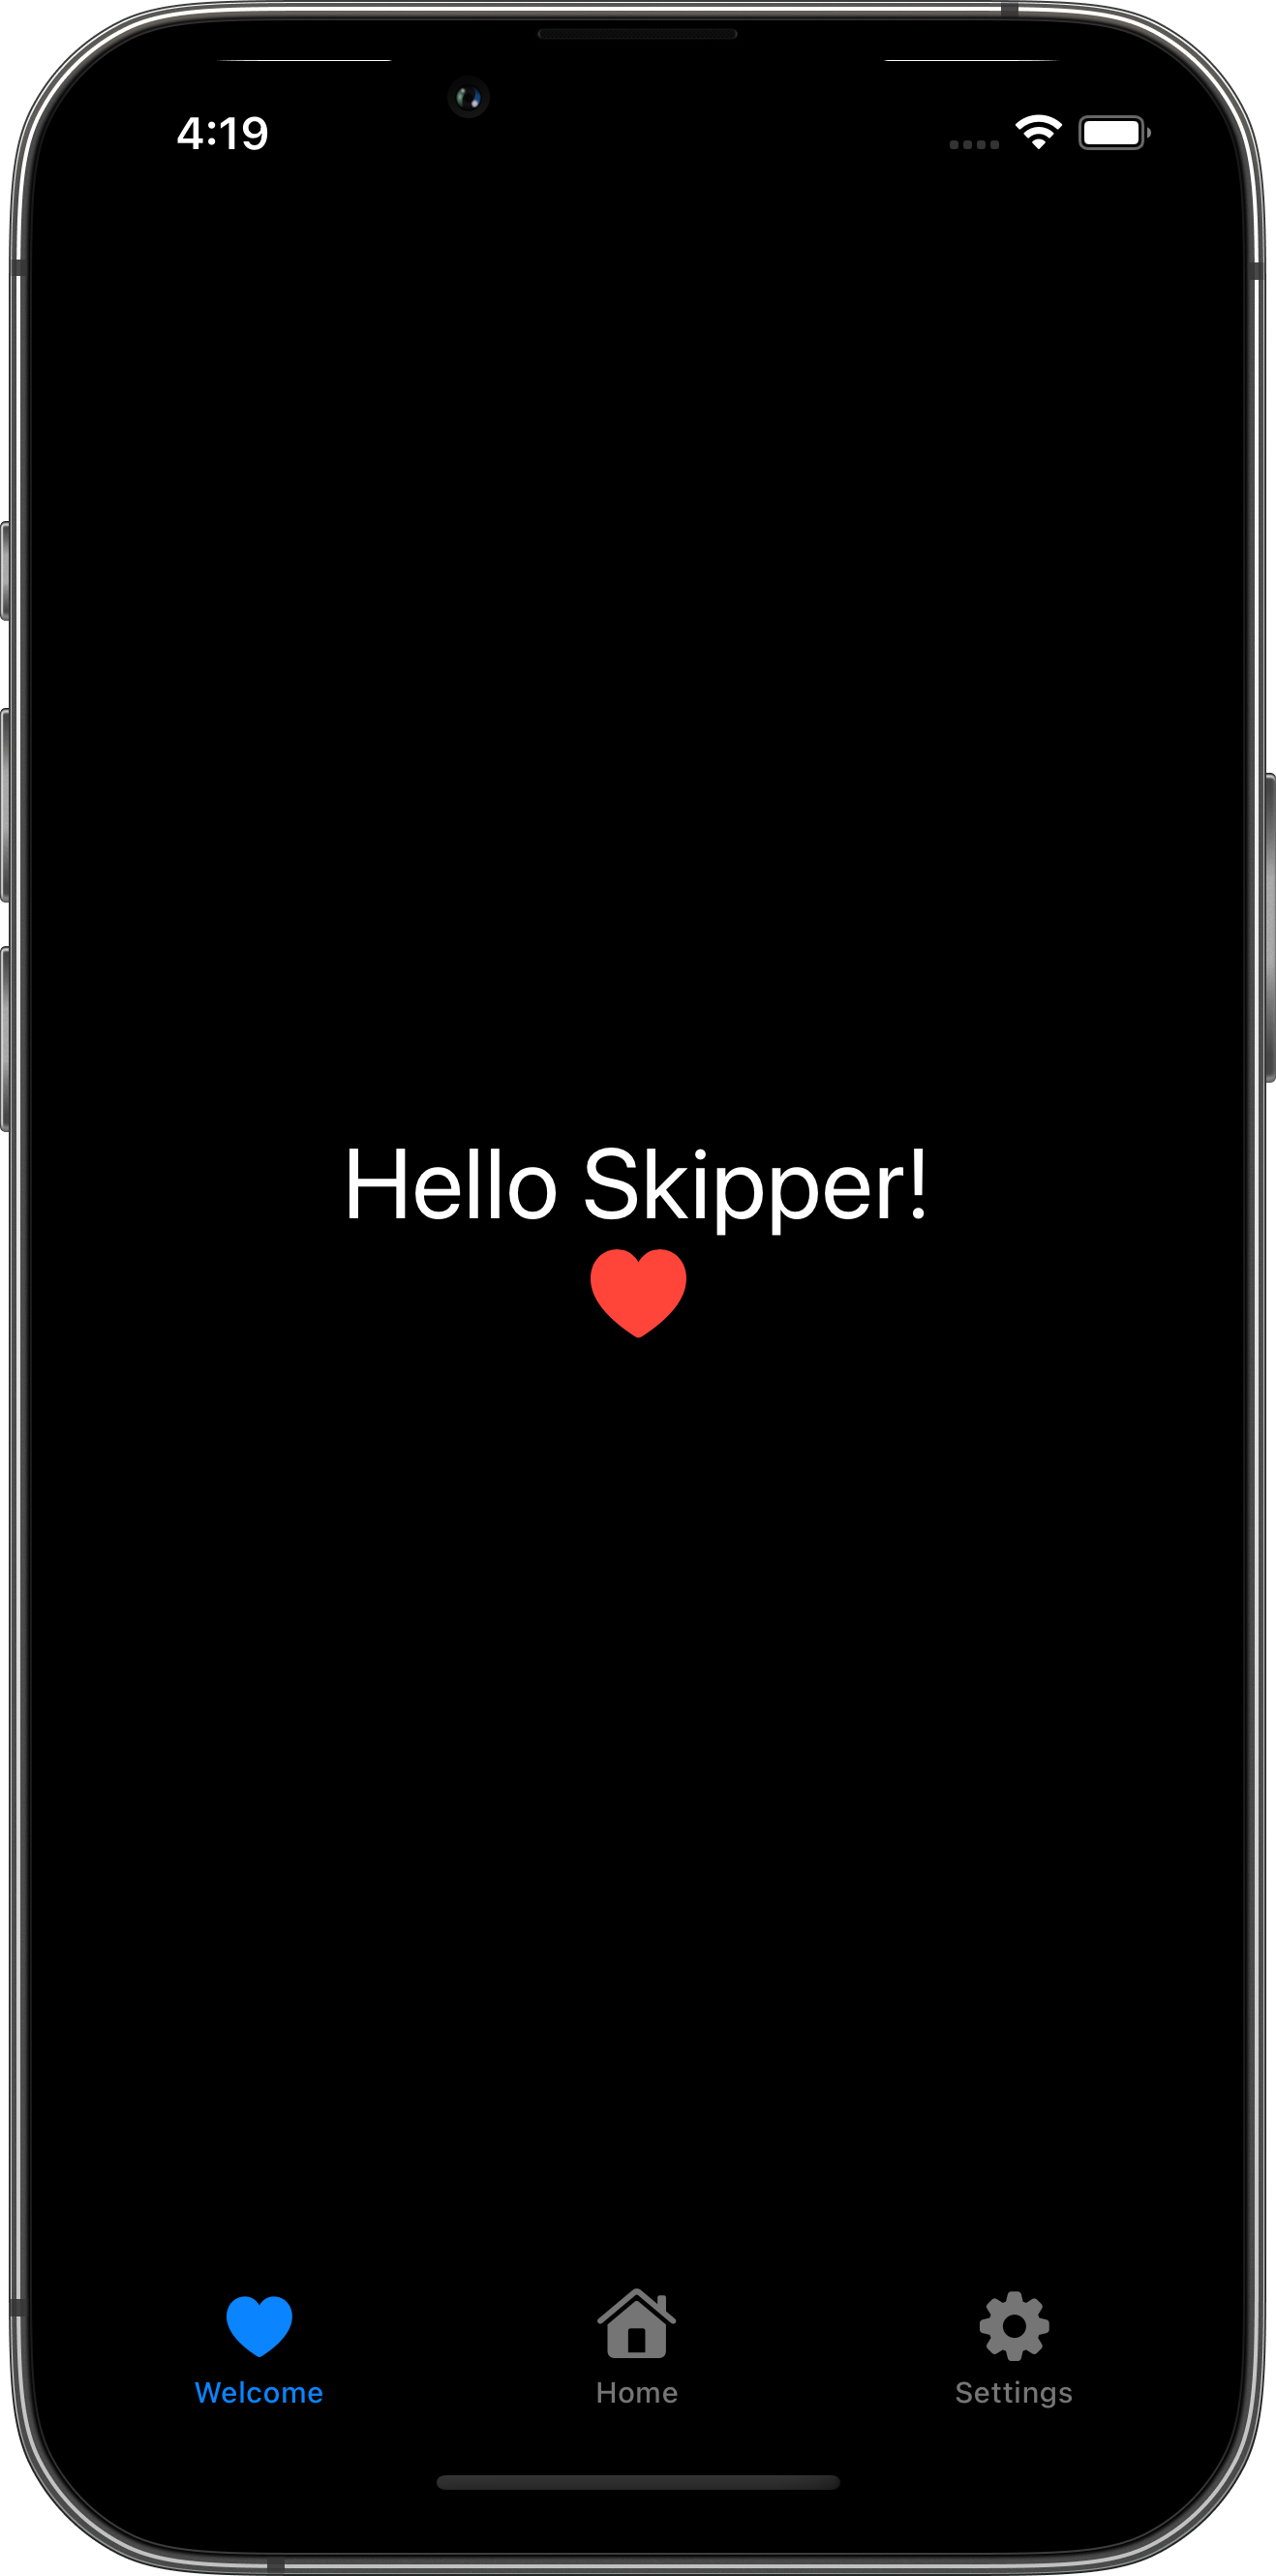
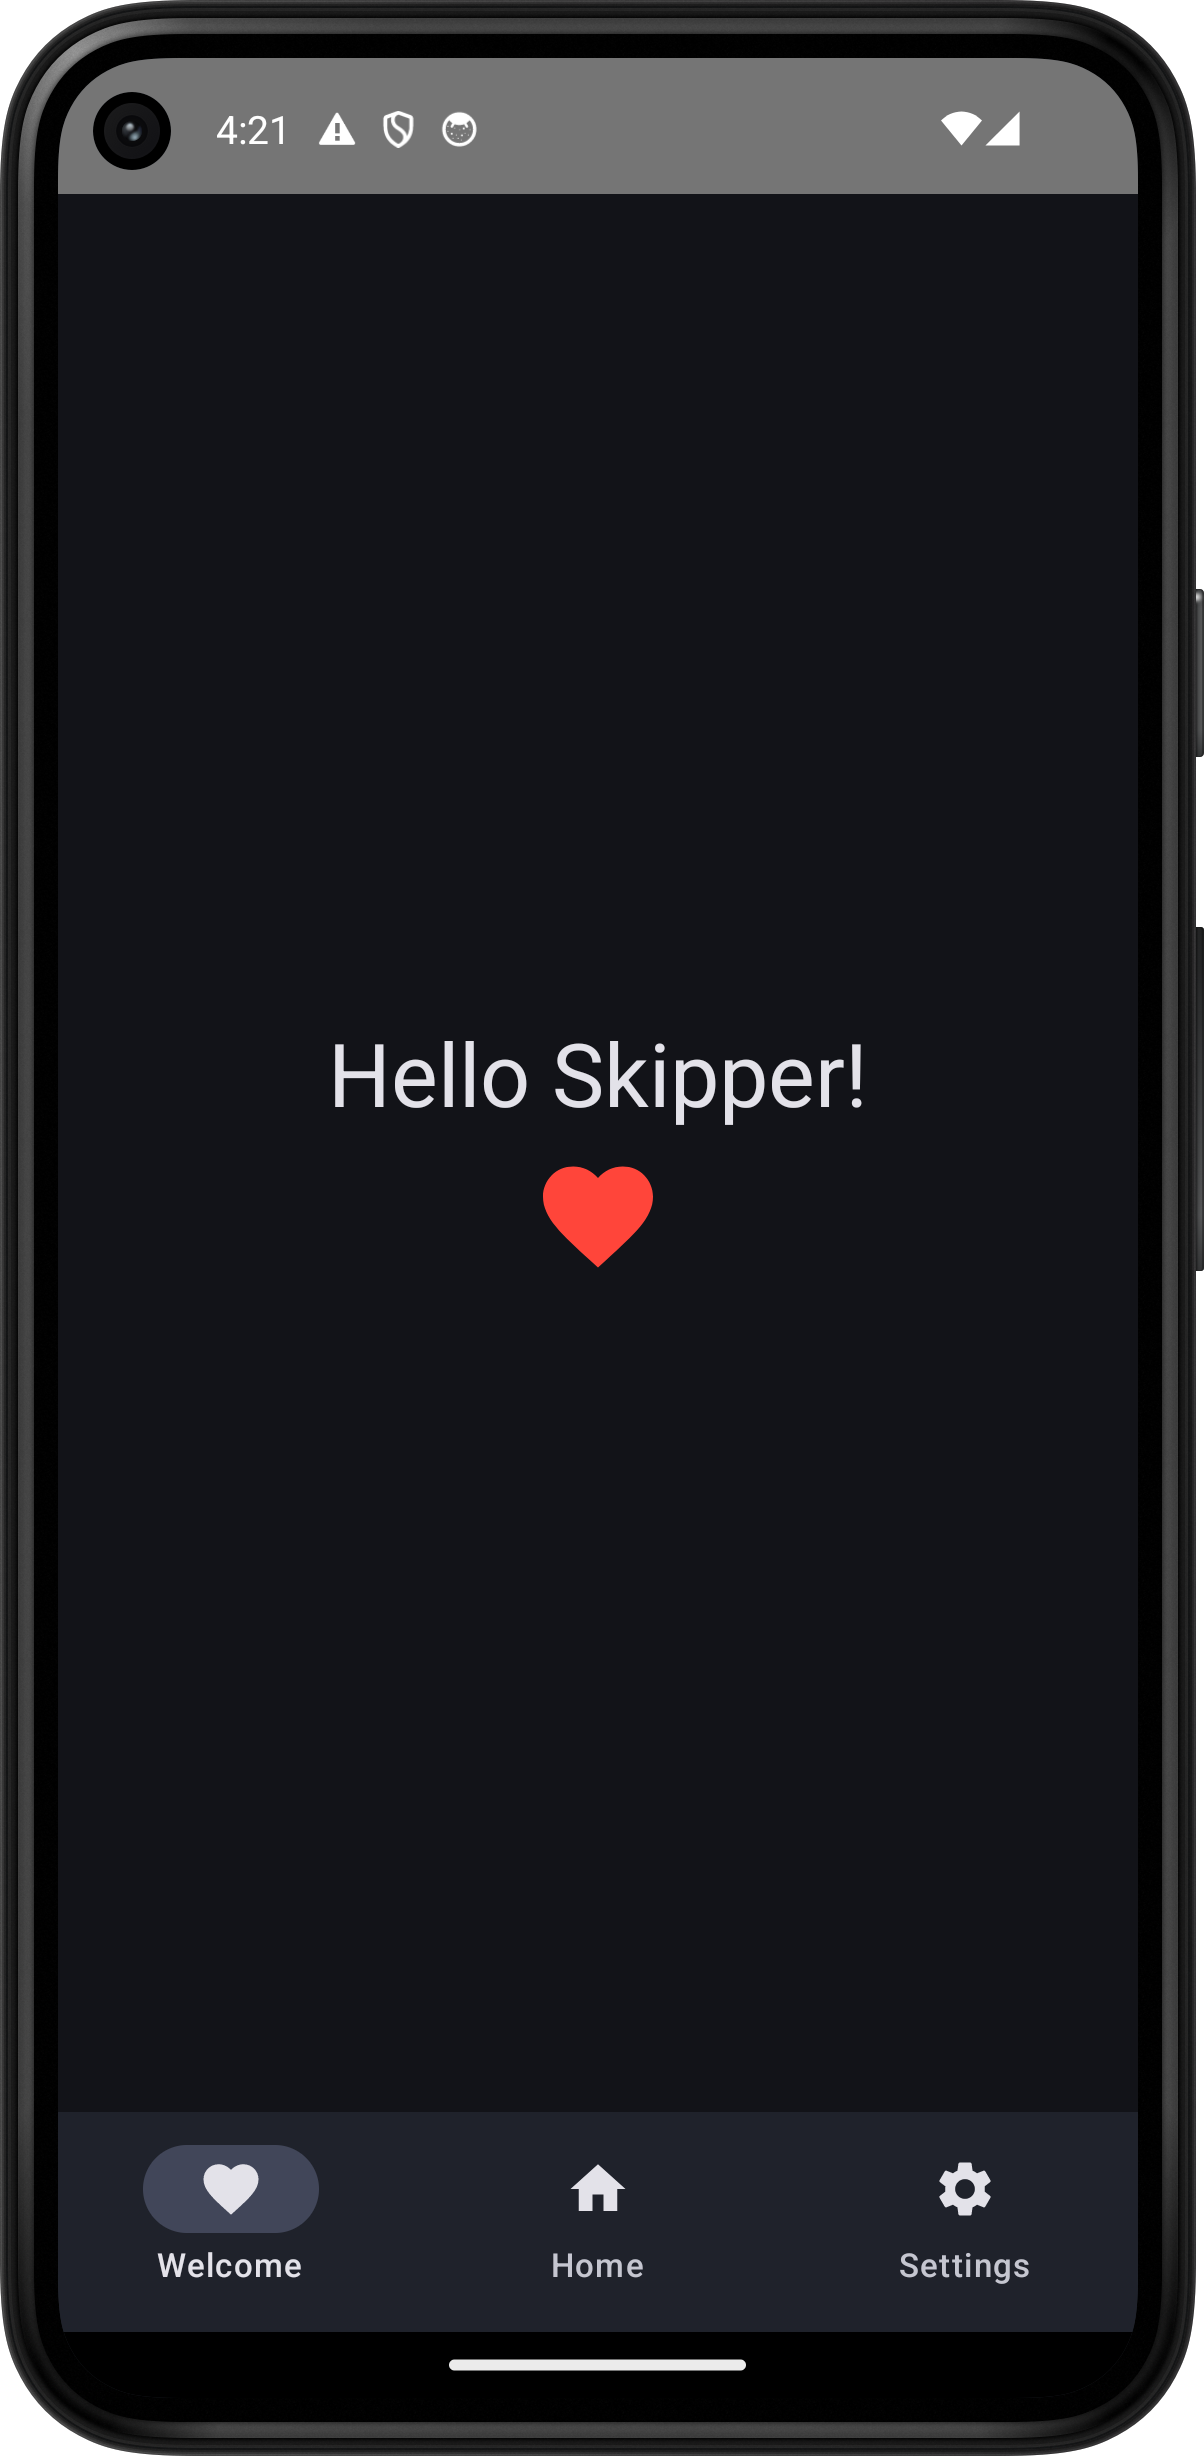
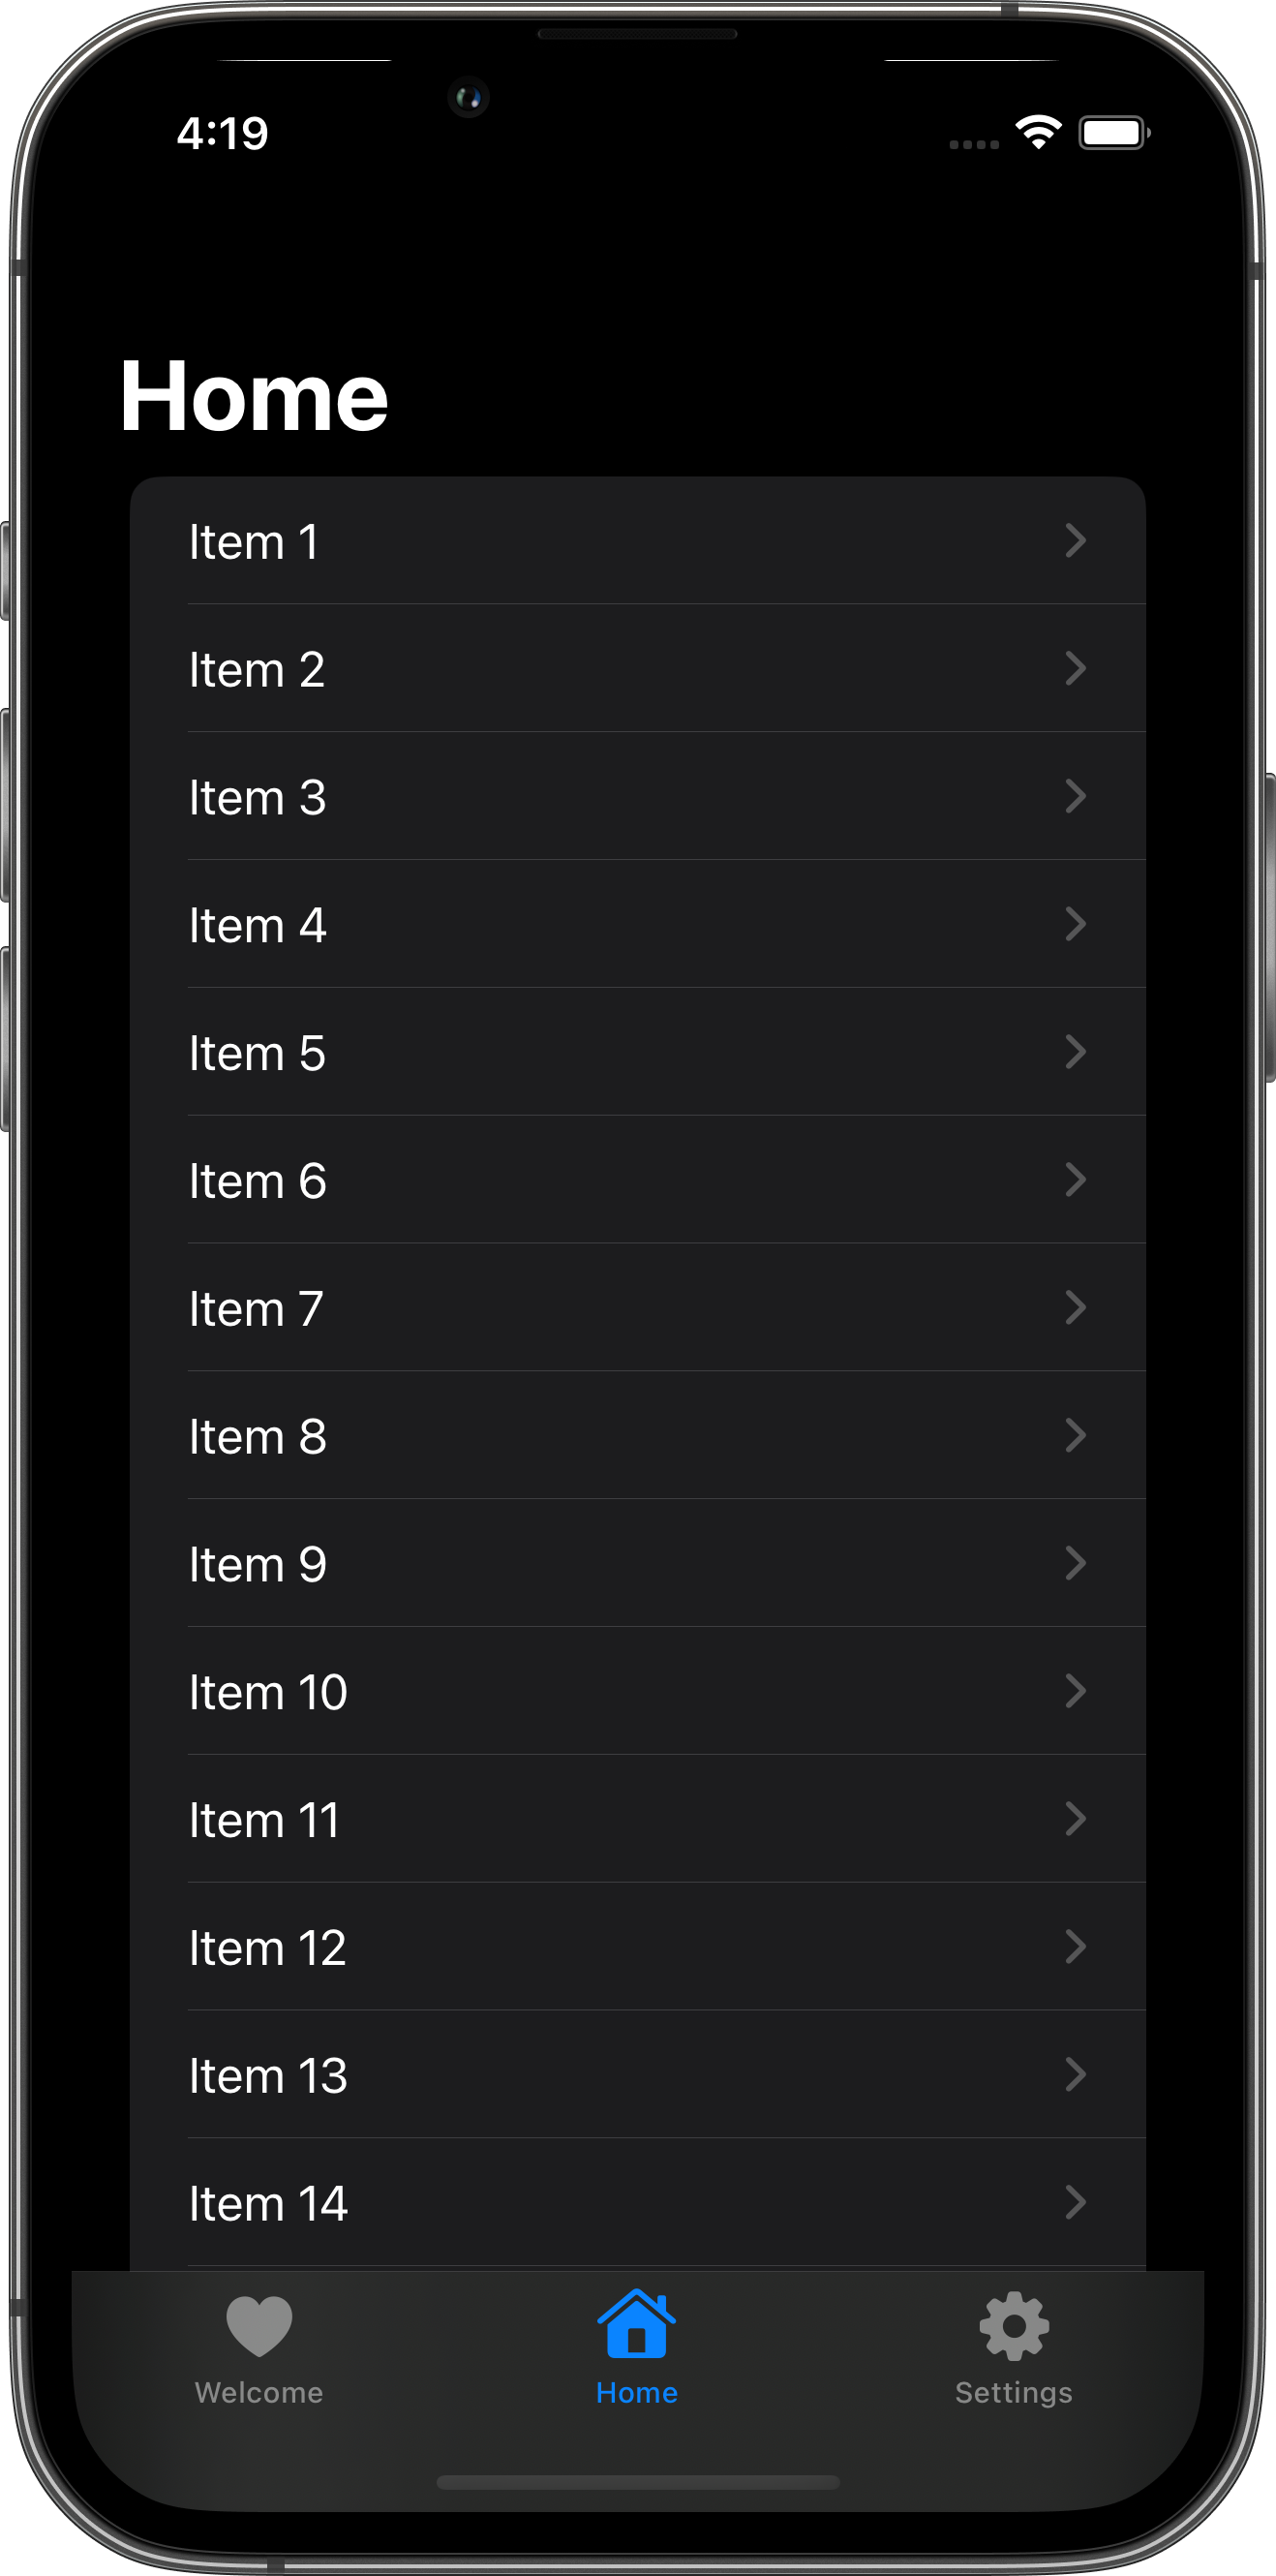
Skip apps don’t just “look native”, they are native: Swift and SwiftUI on iOS, Kotlin and Compose on Android. You know the difference, and so do your users.
Totally Transparent
When you use Skip, no part of your app is hidden from your view… or from your debugger. Skip transpiles your Swift directly into Kotlin source code that you can inspect and customize.
Featherweight
With SkipZero, your iOS app has no dependencies on any Skip frameworks. And the resulting Android app only requires a few Skip open source libraries.
Memory Efficient
With no additional managed runtime, Skip apps are as efficient as they can possibly be on both platforms: bare metal on iOS and ART bytecode on Android.
An Idyllic IDE
Skip’s IDE is Xcode, the premiere app development environment for iOS. For serious Android customization, open the generated code directly in Android Studio.
Perfect Integration
Skip generates standard Kotlin and Compose, so integrating with Android libraries is painless. Call other Kotlin and Java code directly, with no bridging required.
Foundationally Open
Skip’s transpiler is only half the story. The frameworks that underpin iOS app development, such as Foundation and SwiftUI, are made available on Android through Skip’s free and open-source reimplementations.
CI Friendly
Skip transpiles unit tests too! You can ensure that your logic performs identically across platforms. Run your tests headlessly either locally or remotely, making acceptance testing a breeze.
Ejectable
Your code is your own – both the Swift inputs and Kotlin outputs – so you aren’t locked into an ongoing dependency on the Skip transpiler.